Auto")
 Auto")


If you’ve been around the growing community, you’ve probably heard the buzz about biodegradable seedling pots. Maybe you’ve wondered if they’re just another passing trend. Let me tell you, they’re not. These pots are a game-changer because they let you plant the entire pot right into the soil, virtually eliminating transplant shock—the number one killer of seedling momentum.
Why These Pots Are a Grower’s Best Friend
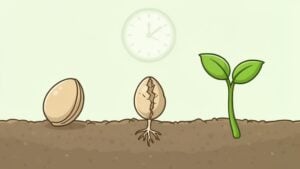
So, what’s the big deal? When you start your cannabis seeds, you’re trying to give them the absolute best head start. Think of a biodegradable pot as a 2-in-1 tool: it’s both a cozy nursery for your seedling and its first meal once it moves into its permanent home. The whole idea revolves around one massive advantage: no root disturbance.
With old-school plastic pots, you have to physically pull the seedling out. No matter how careful you think you are, you’re still yanking its fragile root system from its comfort zone. This creates stress, known as transplant shock, which can stunt a young plant’s growth for days, sometimes even weeks.
For cannabis growers, that lost time is a killer. This is especially true if you’re growing autoflowers, which have a short, fixed lifespan. You can’t get that time back. Minimizing that early stress is the key to developing a strong root network, which is the foundation for vigorous vegetative growth and, ultimately, a bigger, healthier harvest.
Setting the Stage for Success
Making the switch from plastic to biodegradable pots is a simple tweak to your process that pays off in a big way. Here’s a quick rundown of why it works so well for setting your plants up for a successful life:
- Seamless Transition: By planting the whole pot, the roots just keep on growing, pushing right through the pot walls and into the new soil without skipping a beat.
- Reduced Risk: You completely avoid the risk of physically breaking those tender young roots or damaging the main taproot, which is the plant’s lifeline for stability and nutrients.
- Healthier Plants from Day One: A stress-free start means your plant puts all its energy into growing bigger and stronger, not wasting it on recovering from a rough move.
The results really speak for themselves. You’ll hear growers talk about seeing a real difference in how quickly their seedlings take off. This simple swap is a massive advantage, especially if you’re just starting your journey with growing cannabis outdoors, where building a strong foundation from the get-go is everything.
Choosing the Right Pot Material for Your Cannabis Seeds
Not all biodegradable seedling pots are created equal, and picking the right one is just as crucial as perfecting your soil mix. Think of it like choosing the right tool for a specific job—you wouldn’t use a sledgehammer to tap in a tiny finishing nail. Let’s break down the big three you’ll typically find on the shelf: classic peat pots, airy coconut coir, and the quick-to-compost paper pulp options.
Each material really has its own personality and performs differently in a grow setup. Your choice will directly impact everything from water retention to how fast the pot breaks down in the soil. Ultimately, it affects how easily your cannabis seedling’s delicate roots can punch through into their final home. Making the right call this early on really sets the stage for a smooth, stress-free transplant down the line.
Peat Pots: The Old-School Classic
Peat pots are probably what first comes to mind. They’re made from compressed sphagnum peat moss, and their biggest claim to fame is water retention. These pots hold moisture like a sponge, which can be a real lifesaver if you’re growing in a particularly dry climate or just tend to be a little forgetful with the watering can.
But that strength can quickly become a weakness. If you get a little too generous with watering, peat can become completely waterlogged, creating the perfect damp environment for mold or root rot to take hold. They also tend to be the toughest of the bunch, so giving the pot’s sides a few gentle tears right before you plant is a great pro-tip to help those roots break free.
Coconut Coir Pots: The Aeration All-Star
Next up, we have coconut coir pots, which are made from the fibrous husks of coconuts. These are essentially the polar opposite of peat when it comes to handling water. Coir is incredibly porous, offering excellent aeration and drainage for your seedling’s roots. This is a massive advantage in humid environments where “damping off”—a nasty fungal disease that kills young seedlings—is a constant threat.
That open, airy structure encourages strong, “air-pruned” roots. The trade-off? Because they drain so well, you’ll definitely need to water them more often. Still, they strike a fantastic balance between durability and decomposition, making them a super popular choice for all kinds of cannabis seeds. To get your seedlings started on the right foot, check out our comprehensive cannabis seed germination guide for more expert tips.
Paper Pulp Pots: The Fast Decomposer
Finally, there are paper or pulp pots. These are typically made from recycled paper products and are the absolute sprinters of the group when it comes to breaking down. They decompose very quickly once in the soil, ensuring your seedling’s roots face almost zero resistance after you transplant them.
This speedy breakdown is perfect for fast-growing plants like autoflowers, where every single day of growth counts. The main downside is that they can become a bit flimsy if they stay wet for too long, so you have to be careful with your watering. They aren’t as tough as peat or coir, but their rapid decomposition is a major win for certain grows.
To help you decide at a glance, here’s a quick comparison of how these materials stack up for cannabis growers.
Comparing Biodegradable Pot Materials
| Material Type | Water Retention | Decomposition Speed | Best For Cannabis Seeds |
|---|---|---|---|
| Peat Moss | High | Slow | Growers in dry climates or those who tend to underwater. |
| Coconut Coir | Moderate | Medium | Growers in humid areas needing excellent drainage and aeration. |
| Paper Pulp | Low | Fast | Fast-growing strains like autoflowers where rapid root expansion is key. |
Each material offers a unique set of benefits, so the “best” one truly depends on your specific growing environment and the needs of your chosen cannabis strain.
This flowchart illustrates the simple but critical choice between sticking with traditional plastic pots and making the switch to their biodegradable counterparts.
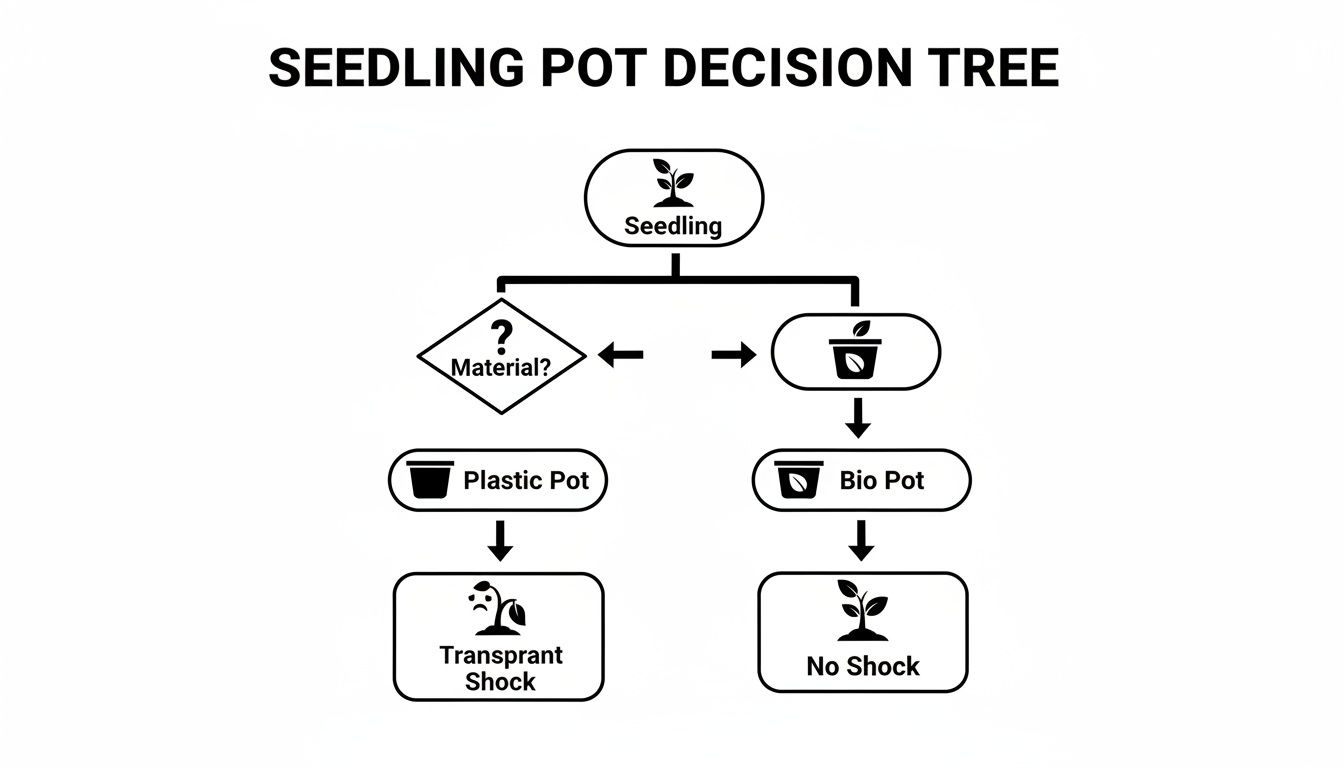
As the visual makes clear, using biodegradable seedling pots is the direct path to avoiding transplant shock and nurturing a happy, thriving plant from the very beginning.
A Step-By-Step Guide to Starting Your Seeds
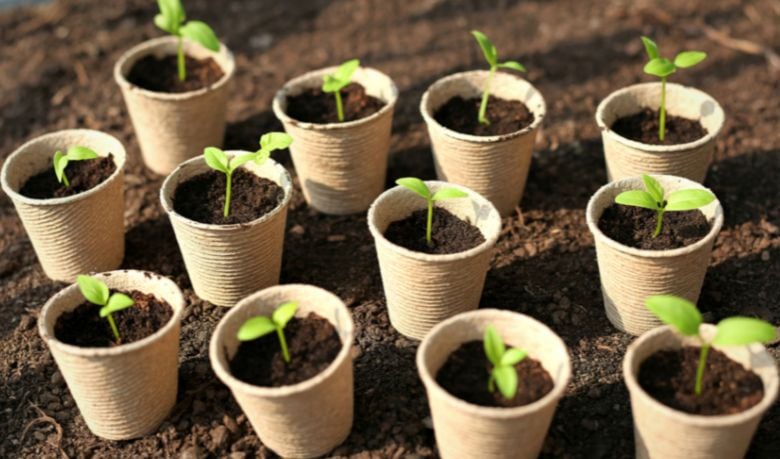
So, you’ve got your biodegradable seedling pots and a fresh pack of cannabis seeds. Awesome. Now comes the fun part. Getting these initial steps right is everything; it sets the stage for a healthy, vigorous plant down the line. Think of it like laying the foundation for a house—you can’t skip it, and it needs to be solid.
The whole idea is to create a cozy, stable little world for that seed. You want to give it everything it needs to pop, push its first set of leaves toward the light, and get established without any unnecessary stress. Let’s break it down.
Prepping Your Pots and Soil
First up, let’s talk soil. You can’t just scoop up some dirt from your garden and call it a day. Seedlings have incredibly delicate roots that need a light, airy mix to grow through. A dense, heavy soil will literally suffocate them before they have a chance to start.
What you’re after is a “soilless” seedling mix. The best ones are usually a simple blend of ingredients that provide excellent aeration and moisture control without being loaded with heavy nutrients.
- Coco Coir: Made from coconut husks, it’s a fantastic base that holds moisture while staying light.
- Perlite: Those little white volcanic rocks are key for creating air pockets and stopping the mix from compacting.
- Vermiculite: This mineral is great for retaining just the right amount of water and nutrients, keeping things moist but never waterlogged.
A good starting point is mixing these in equal parts. Before you fill your pots, lightly pre-moisten the mix. Just add a little water until it feels like a wrung-out sponge, not sopping wet. This simple step prevents the dry pot material from wicking all the moisture away from your seed right after you plant it.
Sowing Your Cannabis Seeds
With your pots filled with that fluffy, pre-moistened mix, it’s time for the main event. Don’t overthink this part. A solid rule of thumb is to plant a seed about twice as deep as it is wide. For most cannabis seeds, that’s somewhere between a quarter-inch and a half-inch deep.
I like to use the eraser end of a pencil to make a small divot right in the center. Drop one seed in (pointed end up is ideal, but don’t sweat it if you can’t tell) and gently brush the soil mix back over it. Whatever you do, don’t pack the soil down. Keep it light and airy.
A classic rookie mistake is planting too deep. If a seed has to burn all its energy just trying to reach the surface, it’s starting life at a huge disadvantage. A shallow depth ensures it can emerge quickly and get to work.
Watering and Creating Humidity
This is where biodegradable pots demand a little extra attention. Because they’re porous, they can dry out faster than plastic, but they can also get soggy and weak if you overdo it. Balance is everything.
Right after you’ve planted the seed, give the soil surface a gentle misting with a spray bottle. This helps settle everything in place. For the first week or so, your best friend is a humidity dome. You don’t need anything fancy; a clear plastic cup or the top half of a water bottle placed over each pot works perfectly. This traps warmth and moisture, creating the perfect micro-greenhouse for germination.
The dome actually does most of the watering for you. Just poke a finger into the soil every day or two. If it feels dry, give it another light mist. Hold off on any heavy watering until your seedling has sprouted and developed a couple of sets of true leaves. By then, its roots will be strong enough to handle a more regular watering schedule.
The Art of a Shock-Free Transplant
This is where biodegradable seedling pots truly shine. Getting the transplant right can make or break your seedling’s future, and these pots are your secret weapon for making the process nearly seamless. Think of it as giving your young plant a first-class ticket to its final destination, minus all the travel stress.
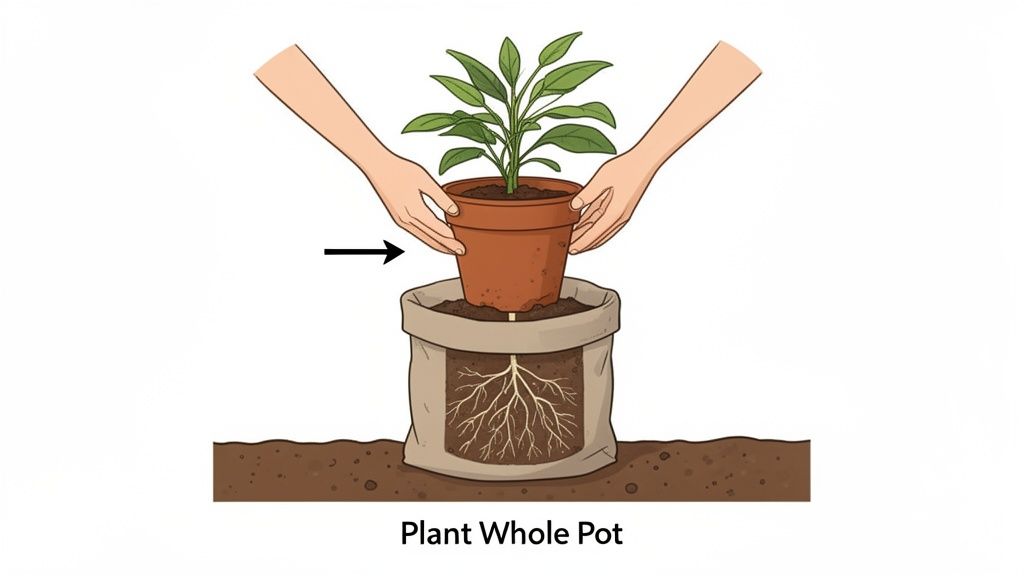
The real magic is that you plant the entire pot. This simple act keeps that delicate, sensitive root ball completely intact and happy. No tearing, no shock, no fuss. This smooth transition sidesteps the growth stall you often see after transplanting from plastic pots, letting your plants get right back to the business of growing.
Let’s walk through how to pull off this crucial step perfectly.
Knowing When It’s Time to Move
Timing is everything. Move your seedling too early, and it might not be hardy enough for the big move. But if you wait too long, you risk it getting root-bound, even in a pot that’s supposed to break down. Thankfully, the plant gives you some pretty clear signals when it’s ready.
Your seedling is itching for a new home when you see these signs:
- It’s showing off at least two or three sets of true leaves—not counting those first little round cotyledon leaves.
- You spot a few delicate, white roots just beginning to peek through the bottom or sides of the pot.
- The plant itself looks robust and well-proportioned to its pot, not spindly and stretching for the light.
Once these signs line up, it’s go-time. Waiting more than a day or two can start to negate the benefits of a stress-free transplant. If you want to dive deeper into growth timelines, you can find a ton of helpful cannabis seed grow advice to guide you.
Prepping for a Seamless Transition
Before you even think about picking up that seedling, prepare its new home. Whether it’s a big fabric pot or a prepared bed in your garden, the prep work is vital. Start by digging a hole that’s just a bit wider and deeper than the seedling pot.
Now, here’s a crucial step: fill that empty hole with water and let it drain away completely. This pre-hydrates the surrounding soil, creating a welcoming, moist environment rather than a shocking wall of dry dirt. It’s an open invitation for the roots to stretch out and explore.
This small step makes a huge difference. Think of it as warming up a pool before you jump in. It gives the plant’s roots a comfortable, hydrated zone to expand into, drastically reducing any potential shock from the move.
Here’s a pro tip to give your roots a head start: help them break free. While the roots can and will grow through the pot walls on their own, you can give them an express lane. Gently tear off the very bottom rim of the pot or, using a clean knife, carefully slice a few vertical slits down the sides. This gives the main taproot and its friends an easy escape route.
Finally, place the whole pot into the hole you dug. You want the top edge of the biodegradable pot to sit just below the level of the surrounding soil. If you leave any of the pot exposed to the air, it can act like a wick and pull precious moisture away from the root zone. Backfill the hole, gently firming the soil around the pot to eliminate air pockets, and finish with a good, thorough watering. That’s it! Your plant is now perfectly positioned for a life of uninterrupted, vigorous growth.
Common Mistakes and How to Avoid Them
Let’s be real—while biodegradable seedling pots are a massive win for growers, they aren’t completely foolproof. They have their own quirks, and knowing what to watch out for is the key to getting all those amazing benefits without any of the headaches. It’s not about being perfect; it’s about being prepared.
The good news is that the most common slip-ups are incredibly easy to sidestep once you know what they are. Think of this less as a list of warnings and more as a friendly heads-up from one grower to another. Let’s dive into the two big ones: overwatering and transplanting too late.
The Overwatering Trap
This is, without a doubt, the number one mistake growers make with biodegradable pots. Because the material is porous, it behaves a lot differently than plastic. Overwatering doesn’t just risk root rot; it can cause the pot itself to get soggy and fall apart way too soon, or it can become a breeding ground for mold.
To keep things balanced, follow these simple strategies:
- Bottom-Water Your Seedlings: Instead of watering from the top, place your pots in a shallow tray of water for about 15-20 minutes. The pots will soak up just what they need without getting oversaturated.
- Check the Weight: A dry pot feels light as a feather, while a properly watered one has some heft. Get a feel for the difference, and you’ll soon learn to water by touch, not on a rigid schedule.
- Ensure Proper Airflow: Good air circulation is crucial. A small, oscillating fan in your seedling area helps the pots dry out evenly and keeps mold from ever getting a foothold.
Transplanting Too Late
The second major pitfall is waiting too long to move your seedling into its final home. The whole point of a biodegradable pot is for the roots to grow through it. If you wait until the plant is severely root-bound, its roots will have formed a dense, tangled mat inside the pot, making it much harder for them to break free and explore their new environment.
You’re aiming for a seamless transition, not a jailbreak. The goal is to transplant when the roots are just starting to poke through the pot walls, giving them a clear path to expand without any resistance.
Look for the visual cues: a few healthy sets of true leaves and the first delicate white roots just peeking through the pot’s sides or bottom. This is the sweet spot. Acting at this stage ensures you’re maximizing the shock-free benefits these pots are famous for.
The market for these eco-friendly options is absolutely booming. The global biodegradable flower pots market hit a value of around USD 575 million this year and is expected to soar to USD 1.5 billion by 2033. For cannabis growers, this means more innovation, better quality pots, and competitive pricing are on the horizon. You can explore more about this market growth on growthmarketreports.com.
Your Questions on Biodegradable Pots, Answered
Got questions? We’ve got answers. Let’s dive into some of the most common things growers ask when they’re first getting started with biodegradable seedling pots. Think of this as a quick chat with a seasoned grower, giving you the direct scoop without any fluff.
How Long Do These Pots Take to Break Down?
This is a great question, and the answer isn’t a single number—it really depends on the material and your soil. Generally, most peat, coir, or paper pulp pots will be gone by the end of a single growing season.
Paper pulp pots tend to be the quickest, often breaking down in as little as 60 to 90 days. The whole idea is for the pot to stay solid while your seedling gets its footing, then break apart easily so the roots can spread out once you transplant it. A healthy, active soil teeming with microbial life will definitely speed things up.
Are Biodegradable Pots a Good Choice for Autoflowering Seeds?
Good? They’re practically a perfect match. Autoflowering strains are on a tight, non-stop schedule from sprout to harvest, which makes them incredibly sensitive to stress. Even a little bit of transplant shock can stunt their growth and significantly cut into your final yield.
Since you plant the entire biodegradable pot, you completely avoid that transplant stress. This lets your autoflower grow uninterrupted, from the moment it sprouts to the day you harvest. It’s one of the simplest and most effective tricks to help an autoflower reach its full genetic potential.
What if I See Mold Growing on the Outside of My Pots?
First off, don’t panic. This is more common than you might think. A bit of white, fuzzy mold on the pot’s surface is usually harmless. It’s just a natural sign that the organic material is starting to decompose, especially if things are a bit humid.
However, if the mold gets out of hand or turns black or green, that’s a red flag. It usually points to overwatering and poor airflow. The fix is pretty straightforward:
- Let the pots dry out more between waterings.
- Get a small fan running to improve air circulation around your seedlings.
- Check that your seedling tray has good drainage so the pots aren’t sitting in a puddle.
Should I Tear the Pot Before I Plant It?
While the roots are strong enough to push through the pot walls on their own, giving them a head start is a pro move. This simple step can help the roots establish themselves in their new home much faster, kicking off vigorous growth right after you transplant.
Just before you pop the pot into the ground, gently tear off the bottom rim. This creates a clear path for the main taproot to shoot straight down. You can also make a few shallow vertical slits along the sides to give the secondary roots an express lane into the fresh soil. It’s a tiny bit of effort for a big payoff in growth.
Ready to give your cannabis seeds the stress-free start they deserve? At Growers Choice Seeds, we offer a huge selection of over 500 lab-tested strains perfect for starting in biodegradable seedling pots. Backed by our 90% germination guarantee, you can grow with confidence. Explore our premium feminized and autoflower seeds today at https://www.growerschoiceseeds.us.