Alright, so you’ve scored some killer cannabis seeds and you’re ready to get a grow going. What’s next? Probably the most important call you’ll make right now is picking the right soil. It’s literally the foundation of your entire grow, and getting it right from the jump is the secret to a killer harvest.
Your Foundation for a Killer Indoor Grow
Look, you can have the best genetics on the planet, but if you stick them in crappy soil, you’ll get crappy results. Just think of your soil as the engine that drives your plant’s potential. The right mix gives it the fuel for explosive growth, while the wrong one can bring your whole operation to a screeching halt.
This guide will get straight to the point. We’re not just talking about “dirt.” We’re talking about creating a living, breathing ecosystem in a pot that directly impacts the health, yield, and potency of your final buds. Once you get a feel for how great soil works, you’ll be able to unlock the full potential of every single seed you pop.
Why Soil Is More Than Just Dirt
Let’s ditch the complicated science for a second. At its heart, the perfect soil for cannabis is just a balanced environment that gives your plant’s roots exactly what they need, when they need it. It all boils down to a three-way partnership between the soil’s structure, its nutrient content, and the life buzzing around inside it.
Here’s what that actually means for your plants:
- Oxygen for the Roots: Cannabis roots have to breathe. If your soil is dense and packed down, the roots will suffocate, which leads to stunted growth or, even worse, root rot. An airy, fluffy mix isn’t just nice to have; it’s a must.
- Water on Demand: The sweet spot is a soil that acts like a sponge, holding onto enough moisture to keep the plant happy without turning into a muddy swamp. It has to drain well, period.
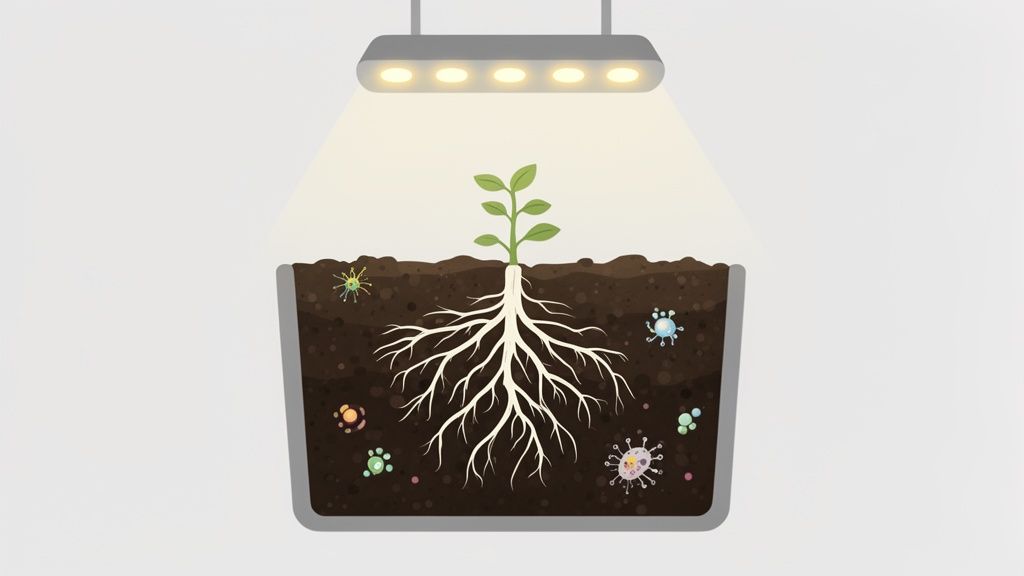
- A Slow-Release Buffet: A truly great “living” soil is packed with organic matter and beneficial microbes. This microscopic crew works 24/7 to break down nutrients into a form your plant can actually use, providing a steady food source for strong, healthy growth.
Think of it like this: your cannabis seeds are the blueprints for a high-performance race car. The soil is the factory and the skilled mechanics who build it. You can have the best design in the world, but without a top-notch facility and crew, you’re gonna end up with a lemon.
Connecting Seeds, Soil, and Success
The link between your seeds and your soil is direct and powerful. A strain bred for high THC needs a nutrient-rich environment to actually produce all those cannabinoids. An autoflower, which lives life in the fast lane, needs a light, airy medium to keep up with its breakneck growth cycle.
Starting with the right soil mix sets you up for an easier, more successful grow from day one. Taking the time to really understand your growing medium is one of the most valuable skills you can learn. For a bigger picture of setting up your whole space, our complete guide on growing cannabis indoors is the perfect next step.
What Makes a Perfect Cannabis Soil Mix
Before you start dumping ingredients in a bucket, it helps to understand what a cannabis plant actually wants from its home. It’s not as complicated as it sounds. At the end of the day, you’re trying to nail the perfect balance between three things: texture, nutrients, and pH. Get these right from the get-go, and you’ll sidestep a whole lot of headaches down the road.
I like to think of it like building the perfect burger. The base of your soil, like coco coir or peat moss, is the bun—it gives everything its structure. Then you have the “patty,” which is your rich compost or earthworm castings; this is the slow-burning fuel, packed with all the essential nutrition. Finally, you have the toppings—amendments like perlite that add that crucial crunch and keep things from getting soggy.
This simple, balanced approach is the real secret to making the best soil for growing cannabis indoors.
The Ideal Soil Texture and Structure
Let’s talk texture first. If there’s one thing cannabis plants absolutely hate, it’s having “wet feet.” That’s just a grower’s term for roots sitting in soggy, waterlogged soil. It’s bad news. It suffocates the roots, rolls out the red carpet for diseases like root rot, and is one of the quickest ways to kill an indoor plant.
The perfect mix is a delicate balance. It needs to hold enough water to keep your plants happy and hydrated but also let the excess drain away without putting up a fight. This is all about aeration.
An airy, fluffy soil does two absolutely critical things:
- Encourages Strong Root Growth: When the soil is light, roots can easily explore and expand, building a dense, healthy network capable of soaking up way more water and nutrients.
- Provides Oxygen: Roots breathe, too! They need oxygen to function. A well-aerated soil is full of tiny air pockets, which is exactly what keeps them from suffocating.
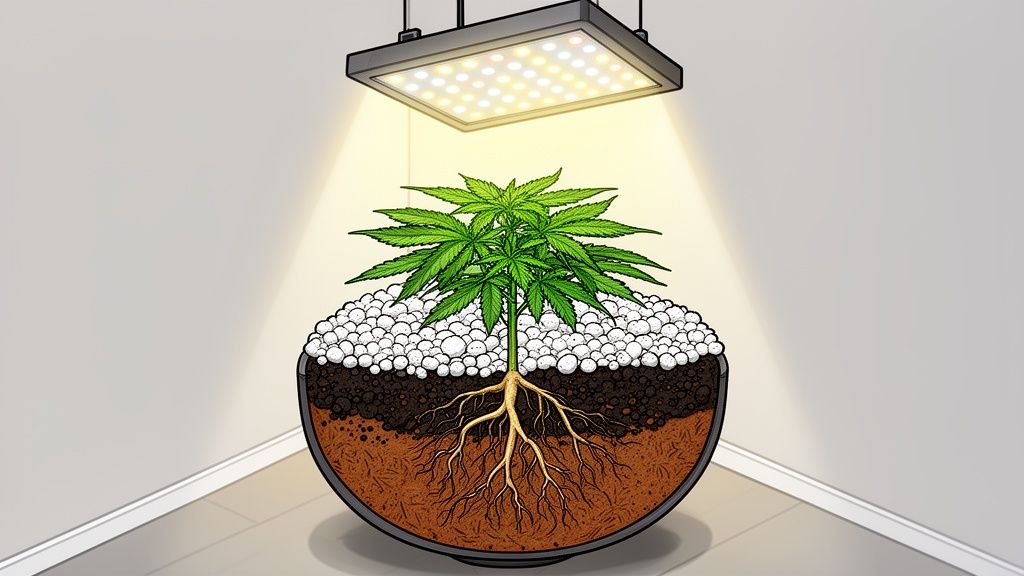
This is why something like perlite is a non-negotiable part of a good mix. It acts like tiny, porous little rocks, creating space and guaranteeing that perfect Goldilocks zone of water retention and drainage. When you run your hands through a great soil mix, it should feel light and springy, not heavy and muddy.
Nutrients and The Living Soil Concept
Okay, now for the food. Your cannabis seeds have a little bit of energy packed inside to get them started, but they’ll be looking for a meal pretty quick. A top-tier soil mix isn’t just some inert stuff to hold the plant up; it’s a living ecosystem teeming with everything your plants need to really take off.
This is where you start hearing about “living soil” or “super soil.” These mixes are deliberately loaded with organic goodies that beneficial microbes and fungi break down over time, feeding your plant naturally.
Think of it like a slow-cooker meal for your plants. Instead of zapping them with a shot of liquid fertilizer, you’re giving them a complex buffet of organic matter. Microbes break it down and serve it up to the roots exactly when needed, creating a steady, reliable supply of nutrients that builds much stronger, more resilient plants.
Some of the best nutrient sources you’ll find in recipes include:
- Compost: The undisputed champion of organic matter. It provides a huge range of nutrients and beneficial microbes.
- Earthworm Castings: People call this stuff “black gold” for good reason. Castings are amazing for improving soil structure and providing nutrients that are super easy for the plant to absorb.
- Bat Guano: A powerhouse of phosphorus, which is exactly what your plants crave to produce big, dense flowers.
- Kelp Meal: A fantastic source of micronutrients and natural growth hormones that boost overall plant health and vitality.
The Importance of a Stable pH
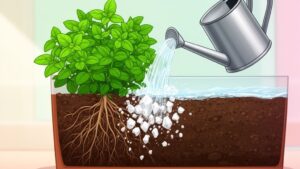
Finally, let’s talk about pH. This one is huge. You could have the most beautiful, nutrient-packed soil in the world, but if the pH is off, your plants can’t eat any of it. The pH level of your soil basically acts as a gatekeeper, deciding which nutrients are available for the roots to absorb.
For cannabis grown in soil, that magic window is right around 6.0 to 7.0.
If your pH drifts too low or too high, your plants can get hit with “nutrient lockout.” This is a super frustrating situation where they show all the signs of a nutrient deficiency, even though the nutrients are right there in the soil. They’re just locked out and unavailable.
Keeping that pH stable is the key to unlocking the full potential of both your plants and the amazing soil you’ve prepared for them. A well-made soil mix will often contain ingredients that help “buffer” the pH, keeping it right in that sweet spot as you water and feed throughout the grow.
A Proven DIY Soil Recipe for Big Yields
Tired of the guesswork? While grabbing a pre-made bag of soil is easy, there’s a certain power in mixing your own. You become the master of your grow, controlling every single ingredient to give your plants the perfect home. And the best part? It’s often cheaper and way simpler than you might think.
Many seasoned growers, myself included, circle back to a classic, time-tested formula. It’s reliable, effective, and beautifully mimics the rich, loamy earth where cannabis thrives in the wild. This isn’t about complicated chemistry; it’s about combining three core components in equal parts.
The Classic 1/3 Ratio Explained
The backbone of countless successful indoor grows is a simple ratio: one part base, one part compost, and one part aeration. Think of it like a three-legged stool—get one leg wrong, and the whole thing falls over. This simple balance is what provides structure for the roots, food for the plant, and oxygen for healthy growth.
This method is so fundamental it’s often called the “holy trinity” of soil mixes. When new growers ask for a recipe, this is almost always the starting point. Across major cultivation forums for growers in the U.S., Canada, and Europe, you’ll see this mix recommended again and again: 1/3 peat moss, 1/3 aeration (like perlite), and 1/3 compost or worm castings. You can find tons of discussions backing this up in community forums dedicated to cultivation.
Let’s pull back the curtain and look at what each of these “thirds” actually does for your plants.
This simple formula provides a fantastic starting point for any grower. Below is a breakdown of the three core components, their purpose, and what you can use for each.
Building Your DIY Cannabis Soil Mix
| Component (1/3 of Total Mix) | Primary Role | Common Options |
|---|---|---|
| The Base | Provides the main structure and moisture retention. Think of it as the bulk of your soil. | Peat Moss, Coco Coir |
| The Nutrients | Supplies the organic food and beneficial microbes that your plants will feed on over time. | High-Quality Compost, Earthworm Castings (Vermicompost) |
| The Aeration | Creates air pockets in the mix, preventing compaction and ensuring roots can breathe. | Perlite, Pumice |
Mixing these three elements in equal parts creates a balanced, living soil that will set your plants up for a healthy and productive life.
Component 1: The Base (1/3 of Your Mix)
First up is the foundation of your mix. This is the bulk material that gives your soil its body. Its main job is to hold on to moisture without turning into a dense, muddy brick when you water.
- Peat Moss: This is the old-school standard for a reason. It’s fantastic at holding water, has a slightly acidic pH that cannabis loves, and creates a wonderfully stable medium for roots.
- Coco Coir: A really popular and sustainable alternative made from coconut husks. Coco has a more neutral pH, resists compaction beautifully, and provides an ideal balance of water retention and aeration. A lot of modern growers swear by it.
No matter which you pick, this ingredient makes up one-third of your total soil volume. It’s the anchor for your plant’s root system.
Component 2: The Nutrients (1/3 of Your Mix)
Now for the good stuff—the food. This is the organic matter that will break down slowly over time, feeding your plants a steady diet of essential nutrients. This is how you turn plain dirt into a thriving ecosystem.
This part of the recipe is where you build the “pantry” for your plants. Instead of force-feeding them with liquid nutrients every few days, you’re stocking the soil with everything they need. The beneficial microbes in the soil will act as the chefs, preparing and serving these nutrients to the roots on demand.
The two best options are:
- High-Quality Compost: This is the beating heart of any living soil. It’s packed with a huge diversity of nutrients and beneficial microorganisms that bring your soil to life.
- Earthworm Castings (Vermicompost): Often called “black gold,” these castings are a true superfood for plants. They’re loaded with readily available nutrients and have been shown to improve soil structure and even help fend off pests.
You can’t go wrong with either, but using a 50/50 blend of both compost and castings for this third of the mix is a pro move. It gives your plants an even richer, more diverse menu to choose from.
Component 3: The Aeration (1/3 of Your Mix)
Last but definitely not least, we need to add some breathing room. This part of the recipe is absolutely non-negotiable for growing in pots. Its only job is to create tiny air pockets throughout the soil, which stops it from becoming a compacted, waterlogged mess.
- Perlite: The most common choice by a mile. It’s the little white, super-light volcanic rocks that look like styrofoam. It doesn’t hold water or add nutrients—it just creates space for air and drainage.
- Pumice: Another type of volcanic rock that works just as well. It’s a bit heavier than perlite, so it’s less likely to float to the top when you water.
Adding an equal part of perlite or pumice gives your soil that light, fluffy texture that cannabis roots absolutely love. This one simple step is your best defense against overwatering and the dreaded root rot that can destroy an entire harvest.
Why Soil pH Is Your Secret Weapon

Alright, let’s talk about something that can feel a bit technical but is actually one of the most powerful tools in your entire growing toolkit: pH. You can create the most incredible, nutrient-rich soil imaginable, but if your pH is off, your plants are going to starve. It’s really that simple.
Think of pH as a gatekeeper for nutrients. Your plant’s roots are eager to absorb all the good stuff you’re providing, but the pH level decides which nutrients actually get through the gate. If the soil is too acidic or too alkaline, that gate slams shut for certain essential minerals. They can be right there in the soil, but your roots are completely locked out.
This incredibly frustrating problem is called nutrient lockout, and it’s the secret villain behind a huge number of plant health issues. Your plant might show all the signs of a deficiency, but the real issue is that it physically can’t access the food you’ve already given it. Getting this one thing right is an absolute game-changer.
Finding the pH Sweet Spot
So, what’s the magic number? For cannabis grown in soil, the ideal range is a slightly acidic window between 6.0 and 7.0. Within this specific zone, all the crucial nutrients—from the nitrogen needed for leafy growth to the phosphorus and potassium that build massive buds—are easily available for the roots to soak up.
This isn’t just grower folklore; research backs it up. A 2019 review on indoor cannabis cultivation confirmed that while older guidelines were a bit broader, controlled studies have consistently pinpointed 6.0 to 7.0 as the optimal pH for soil-based grows. In fact, many experienced indoor growers narrow that down even further, aiming for a tight 6.0–6.5 to really dial in nutrient uptake. You can dig into the science yourself in the full horticultural review.
When your soil’s pH is in this sweet spot, you’re not just feeding your plants; you’re letting them feast. Everything works better. Nutrients are absorbed efficiently, growth is more vigorous, and the plant is stronger and more resilient against stress.
If the pH dips too low (becoming too acidic), you’ll start to lock out key nutrients like calcium and magnesium. Let it climb too high (too alkaline), and you’ll run into problems with iron and manganese availability. A simple pH imbalance can easily fool you into thinking you have a different problem, like spotting the signs of a potassium deficiency in your cannabis when the root cause is just a bad pH reading.
How to Test and Adjust Your pH
You absolutely do not need a chemistry degree to manage your soil’s pH. It’s a simple process that quickly becomes a normal part of your watering routine. Here’s how you stay on top of it.
First, you’ll need a way to measure pH. The most common tools are:
- pH Test Strips: These are the classic, low-cost option. Just dip a strip into your water or soil runoff, and it changes color. Match that color to the included chart, and you’ve got your reading. Simple and effective.
- Digital pH Pen: This is a step up in precision and convenience. A digital pen gives you an exact, instant number, taking all the guesswork out of it. They’re a favorite among serious growers for their accuracy.
You’ll want to test two things regularly: the water you’re about to feed your plants with, and the “runoff” water that drains from the bottom of your pots after you water. The runoff is your window into what’s really happening down in the root zone.
Making Simple Adjustments
If your tests show a pH outside that golden 6.0-7.0 range, don’t sweat it. Fixing it is easy. You can find “pH Up” and “pH Down” solutions at any grow shop. These are concentrated liquids that you add in tiny amounts—we’re talking just a few drops—to your water before you feed your plants.
- If your pH is too high (alkaline): Add a couple of drops of pH Down to your water, give it a good stir, and test it again.
- If your pH is too low (acidic): Add a few drops of pH Up, stir, and re-test.
Always, always make these adjustments to your water before it touches your plants. This simple habit ensures that you’re delivering a perfectly balanced meal every time, allowing your plants to absorb every last bit of the nutrition you’ve so carefully prepared. Mastering your pH is the step that takes a good harvest and makes it a great one.
Choosing the Right Pot for Your Soil
So you’ve gone to all the trouble of creating the perfect soil mix for your indoor cannabis grow. Fantastic. But where are you going to put it? Your choice of container is a much bigger deal than most people think. The wrong pot can completely sabotage a brilliant soil mix, leaving you with soggy roots, stunted growth, and a seriously disappointing harvest.
Think of it this way: if your soil is the engine, the pot is the chassis and the exhaust system rolled into one. It has to support the plant and, just as importantly, let the whole system breathe. Let’s look at the two main players you’ll find in any indoor grow setup: the classic plastic pots and the increasingly popular fabric “smart” pots.
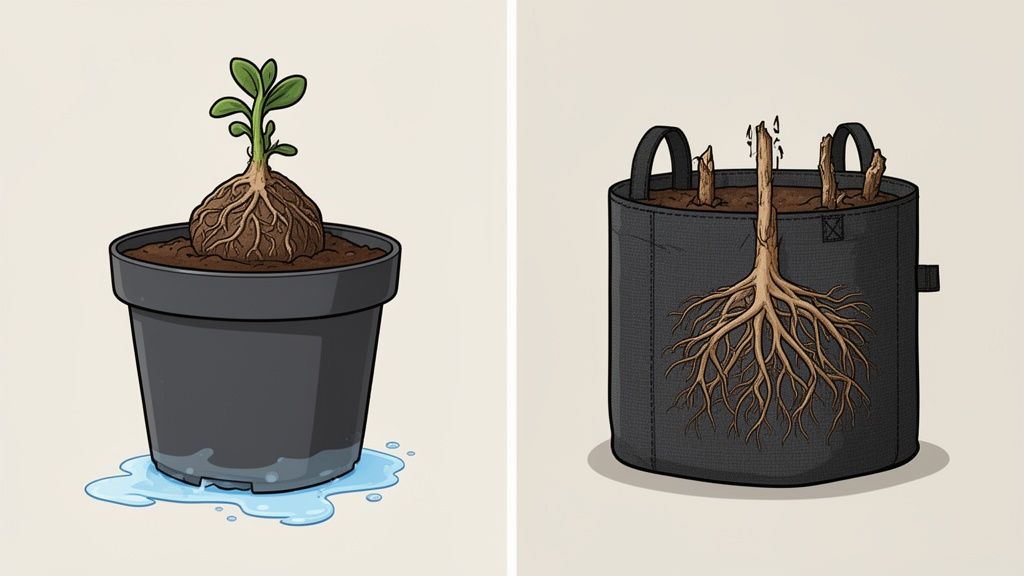
The Great Debate: Plastic Pots vs. Fabric Pots
The container you use has a direct line to your plant’s health. It dictates drainage, how much oxygen gets to the roots, and even the physical shape of the root mass. This isn’t a minor detail—it’s foundational to setting your plants up for success.
Plastic Nursery Pots
These are the old-school standard. We’ve all seen them. They’re cheap, you can reuse them, and they’re available everywhere.
- Pros: Their biggest advantage is moisture retention, meaning you might not have to water quite as often. They’re also rigid and pretty easy to scrub clean between grows.
- Cons: Here’s the catch: drainage and airflow are their weak points. Those solid walls can easily lead to a waterlogged swamp at the bottom if you’re not careful. Worse, when roots hit the side, they have nowhere to go but in circles. This leads to the dreaded “root-bound” plant—a tangled, knotted mess that effectively chokes itself.
Fabric “Smart” Pots
There’s a good reason these have become the go-to for serious growers. Made from a thick, porous, felt-like material, they completely change the game for root health.
- Pros: The breathable fabric provides incredible drainage and allows a constant supply of oxygen to flood the root zone. This creates a much healthier environment and makes overwatering way more difficult.
- Cons: The trade-off for all that airflow is that they dry out much faster than plastic. You’ll need to stay on top of your watering schedule. They can also be a little messy, as fine particles of soil and perlite can sometimes work their way through the material.
The real magic of fabric pots comes down to a process called “air pruning.” When a root tip grows out to the edge and hits the air through the fabric, it naturally dies off. This is a good thing! It signals the plant to shoot out dozens of new, fibrous feeder roots throughout the soil. The result is a dense, highly efficient root ball instead of a few long, circling roots.
Getting the Pot Size Right
Choosing the right pot size is a classic balancing act. If you go too big, the soil will stay wet for far too long, creating a perfect environment for root rot. Go too small, and your plant will become root-bound in a flash, stunting its potential. The ideal size really depends on what kind of cannabis seeds you’re growing and how big you want your final plant to be.
Here’s a simple cheat sheet to get you started:
- Seedlings and Clones: Always start small. A solo cup (with holes poked in the bottom!) or a 1-gallon pot is perfect. This prevents you from drowning the delicate young plant in a huge volume of soil.
- Autoflowers: These plants are on a tight schedule and hate being stressed. For that reason, it’s best to plant them directly into their final pot. A 3 to 5-gallon fabric pot is the sweet spot for most auto strains.
- Photoperiod Plants: Since you get to decide when they start flowering, you have more flexibility. Many growers will “pot up” once or twice. A common progression is from a 1-gallon starter pot to a 5 to 7-gallon pot for the plant’s final home. This gives the root system all the room it needs to support a big, productive plant.
Watering and Feeding Your Cannabis Plants
So, you’ve got your plant settled into its new home, surrounded by the perfect soil. Now for the ongoing care—the daily dance that keeps your cannabis thriving. This is where a lot of first-time growers trip up, often by showering their plants with a little too much affection from the watering can. Make no mistake: overwatering is the number one killer of indoor cannabis.
The good news? You can throw those rigid watering schedules out the window. Your plants will tell you exactly when they’re thirsty; you just have to learn their language. Luckily, a couple of old-school, foolproof methods have stood the test of time.
Learning to Read Your Plants
First up is the “pot lift” method. Right after you’ve given your plant a thorough watering, lift the pot. Get a real sense of that “full” weight. A few days later, lift it again. Does it feel noticeably lighter, almost airy? That’s your cue. It’s time to water. This simple trick becomes second nature surprisingly fast.
The other classic is the “finger test.” Just stick your index finger into the soil, about an inch or two down. If your finger comes out dry and clean, it’s time for a drink. If moist soil clings to it, hold off for another day or two. Trust your sense of touch—it’s far more reliable than any calendar.
When you do water, make it count. Pour the water slowly and evenly around the plant’s base, continuing until you see about 10-20% of the total volume draining out the bottom. This ensures the entire root system is hydrated and, just as importantly, helps flush out any accumulating salts from the soil. For a more detailed look at this vital skill, our guide on when to water weed plants breaks it all down.
When to Start Feeding
What about food? Well, if you took the time to create a rich “super soil” like we outlined earlier, you can sit back and relax for a while. That mix is a slow-release buffet, packed with everything your plant needs. You might not have to add a single drop of extra nutrients for the first 3 to 6 weeks. The soil handles it all.
On the other hand, if you started with a simpler, less-amended medium (like a basic coco and perlite blend), you’ll need to step in as the chef. These lighter mixes are more like a blank canvas, so you’ll probably need to start introducing liquid nutrients within the first couple of weeks.
Think of it like this: a super soil is a fully stocked pantry. Your plant can grab what it needs for weeks. A lighter mix is more like an empty fridge—you have to supply the groceries regularly.
Your plants will always give you clues. Watch for signs of hunger, like the lower leaves beginning to turn yellow. When it’s time to feed, always start with a half-strength dose of your chosen nutrients to see how your plant reacts. It’s far easier to give a hungry plant more food than it is to fix a burnt, overfed one.
Ready to pair some top-shelf genetics with your perfectly prepped soil? At Growers Choice Seeds, we offer premium, lab-tested cannabis seeds that will flourish in your indoor garden. Browse our massive selection of autoflower and feminized strains, all backed by a 90% germination guarantee.
FAQs
Can I Reuse My Soil for the Next Grow?
You definitely can, but it’s not as simple as just popping a new seed into the old pot. By the end of a grow, your soil is tired. Its initial nutrient charge is gone, and the structure has likely compacted.
To bring it back to life, you’ll need to “re-amend” it. This just means mixing in fresh compost, earthworm castings, and other goodies to recharge the nutrient bank. You’ll also want to add more perlite or pumice to bring back that light, fluffy texture roots love. A word of caution, though: if your last crop battled any pests or diseases, just toss the old soil. It’s not worth the risk of infecting your brand new plants.
Do Different Cannabis Seeds Need Different Soil?
They sure do. While the fundamentals of good soil—drainage, aeration, and water retention—are universal, you can definitely tweak your mix to cater to specific types of cannabis seeds and get better results.
Autoflower Seeds: These plants are on a mission. They have a short, fixed lifespan and don’t have time to recover from stress. They do best in a lighter, airier soil that isn’t loaded with nutrients from day one. A really rich “super soil” can be too “hot” for their sensitive seedlings.
Photoperiod Seeds: These plants are more marathon runners than sprinters. They have a longer vegetative stage, giving them plenty of time to tap into a nutrient-dense soil. A richer mix packed with compost will fuel their growth for weeks before you even need to think about liquid nutrients.
How Can I Tell If My Soil Is Too Wet or Too Dry?
This is probably the biggest hurdle for new growers. The secret is to stop watering on a calendar schedule and start listening to your plants and their pots.
The “pot lift” method is your most reliable tool. Pick up a pot right after you’ve given it a thorough watering and get a feel for that weight. A few days later, lift it again. If it feels dramatically lighter, it’s watering time. If it still has some heft, give it another day.
You can also use the classic finger test. Just stick your index finger an inch or so into the soil. If it comes out clean and dry, the plant is thirsty. If it comes out with moist soil sticking to it, hold off. Your roots need oxygen just as much as they need water, and you don’t want to drown them.