Auto")
 Auto")


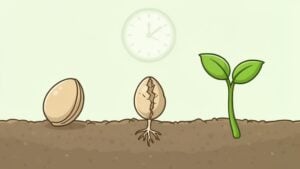
So, what exactly is a humidity dome? Think of it as a personal little greenhouse for your seed tray. It’s just a simple plastic cover, but it’s one of the most powerful tools you can have when starting seeds, especially high-value cannabis seeds. It creates a warm, steamy nursery that gives your seedlings the perfect head start.
Why Humidity Domes Are a Grower’s Best Friend

Trying to pop seeds in the open air can be a crapshoot. The environment is just too unpredictable. A humidity dome takes all the guesswork out of the equation by creating a stable, controlled microclimate right where your seeds need it most.
This consistency is everything for a seed that’s just starting its life. The combination of steady warmth and moisture helps soften the seed’s tough outer shell, which is the green light it needs to start sprouting. This is especially critical when you’re working with premium genetics from a source like Growers Choice Seeds, as it protects your investment and sets you up for success.
Creating the Perfect Germination Zone
A humidity dome does more than just keep things damp; it builds the ideal little ecosystem for a seed to pop.
Here’s a quick rundown of what it’s doing for you:
- Locks in Moisture: It stops your starter plugs or soil from drying out, which is a death sentence for a brand new taproot.
- Maintains Warmth: The dome traps heat from your grow lights or a heat mat, keeping the temperature right in that sweet spot for germination.
- Shields from Drafts: It acts as a barrier, protecting your fragile seedlings from drafts and sudden temperature swings that could easily kill them.
By creating this stable, high-humidity bubble, you’re basically telling the seed, “Hey, conditions are perfect. It’s go-time.” This is what kickstarts all the biological processes needed for a strong, healthy plant to emerge.
Humidity domes provide a straightforward way to give your seedlings the best possible start. Let’s break down the main advantages.
Humidity Dome Benefits at a Glance
| Benefit | How It Helps Your Seedlings |
|---|---|
| Consistent Moisture | Prevents the growing medium from drying out, protecting the delicate taproot. |
| Stable Warmth | Traps heat to maintain the ideal temperature range needed for germination. |
| Faster Germination | The warm, humid conditions soften the seed coat, speeding up the sprouting process. |
| Higher Success Rate | Creates a reliable environment, significantly increasing the number of seeds that pop. |
| Protection from Elements | Shields fragile sprouts from drafts, pests, and sudden environmental changes. |
As you can see, a simple piece of plastic can make a massive difference in your results.
Boosting Your Success Rate
The results speak for themselves. Using humidity domes for seedlings isn’t just a popular technique; it’s a proven one. These simple covers trap moisture and heat, creating a microclimate with humidity levels often well over 75%—perfect for triggering the enzymes that break down a seed’s coat.
Grower reports and countless side-by-side tests have shown that domes can boost germination rates by a staggering 30-50% compared to open-air trays. That means more of your seeds sprout, and they tend to do it faster and more uniformly. To dive deeper, you can explore detailed guides on creating ideal seeding conditions from horticultural experts.
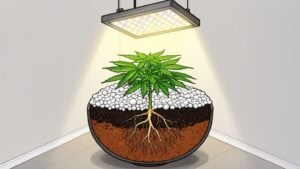
Choosing the Right Humidity Dome for Your Grow

When you’re browsing for humidity domes, they might all look pretty much the same. But the subtle differences between them can have a real impact on your seedlings’ success, especially when you’re growing cannabis strains with their own unique needs.
The first thing to check is the fit. Most domes are made to sit on a standard 1020 seed tray. You’re looking for a snug, tight seal around the rim. If it’s loose or wobbly, that precious humid air you’re trying to trap will leak right out, defeating the whole purpose.
Standard vs Tall Domes
Now, let’s talk about height. Your first big decision is whether to go with a standard dome or a tall one.
Standard domes are usually short, around two to three inches tall. They’re absolutely perfect for the very beginning, when you’ve just planted a seed in a starter plug and are waiting for it to sprout.
But some plants shoot up fast. A lanky sativa or a vigorous autoflower can easily touch the top of a short dome in just a few days. For these, a tall dome—often six or seven inches—is a much smarter choice. It gives your seedlings the headroom they need to stretch their legs before they’re ready for the open air.
Think of it this way: a standard dome is like a nursery for a newborn, while a tall dome is the toddler room. It gives your plants the space they need to grow without feeling cramped, preventing bent stems or damaged leaves right from the start.
Vented vs Non-Vented Domes
Another key feature to look for is ventilation. Some domes are just a solid piece of plastic, while others have adjustable vents built into the top. A simple, non-vented dome is great for locking in that 100% humidity right after you’ve planted your seeds.
Once those little green sprouts appear, however, those vents become your best friend. They give you a way to slowly acclimate your plants to the lower humidity of your main grow space—a process called “hardening off.”
You can start by cracking the vents just a tiny bit, then open them more over a few days. This simple feature makes the transition so much smoother and dramatically reduces the risk of shocking your delicate seedlings. If you can swing it, a vented dome offers far more control and is a worthy investment for any grower.
Setup for Perfect Germination
So, you’ve got your humidity dome and a fresh pack of premium cannabis seeds. Now for the fun part—setting up their first home. This process is simple enough, but paying close attention to the details is what really sets you up for a successful grow.
First things first, get your germination medium ready. Whether you’re working with rockwool cubes, soil pucks, or starter plugs, they need to be properly moistened. You’re not looking for soaking wet, which can easily lead to rot. Instead, think of a sponge that’s been thoroughly wrung out. That’s the perfect level of moisture.
Once your medium is prepped, it’s time to plant your seeds. A good rule of thumb is to place the seed about twice as deep as it is wide, which usually works out to about a quarter-inch down. Gently cover it, arrange your plugs in the tray, and give everything a final, light misting before you pop the dome on.
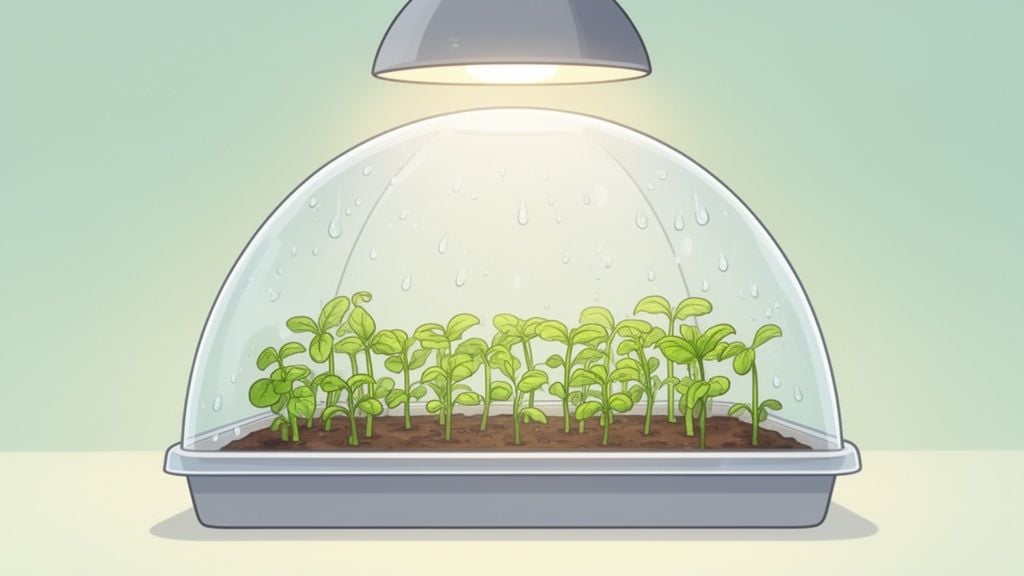
Getting the Environment Just Right
With your seeds tucked in, place the dome over the tray, making sure you get a nice, snug fit. A good seal is key to trapping moisture and creating that warm, humid environment that tells your seeds it’s go-time.
From here, you just need to keep an eye on two things:
- Temperature: Your sweet spot is a steady 70-80°F (21-27°C). If you’re growing in a cooler space, a seedling heat mat placed under the tray is a game-changer for maintaining that ideal soil warmth.
- Humidity: Aim for a relative humidity between 75-90%. The easiest way to know you’ve hit this target is seeing condensation build up on the inside of the dome.
Here’s a little pro tip: once a day, quickly wipe the inside of the dome to clear away any heavy water droplets. This simple step prevents water from dripping down and over-saturating your plugs, all while keeping the air perfectly steamy.
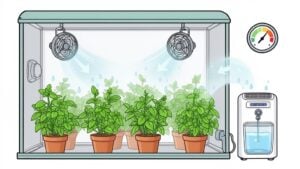
This isn’t just a trick for home growers. In commercial grows, using humidity domes for seedlings is standard practice for getting consistent results. Pros often report 25-40% better uniformity in their seedling batches, a huge deal when you’re growing at scale. One study even noted that domes cut germination time by four days, which translated to about a 15% savings on heating and lighting costs.
By following these steps, you’re giving your seeds the stable, nurturing environment they need to get a strong start. If you want to explore other germination techniques, our complete cannabis seed germination guide is a great resource. Now, all that’s left is to be patient and let your setup work its magic.
Nailing the Perfect Temperature and Humidity Levels
Alright, you’ve got your humidity dome. Now let’s talk about where the real magic happens. Getting the environment just right is about more than just following a formula; it’s about giving your seeds and seedlings exactly what they’re craving.
Think of it as a one-two punch of warmth and moisture that signals it’s time to wake up and get growing.
Consistent warmth is the first signal, telling the seed that spring has officially arrived. That heat activates enzymes inside, kickstarting the entire germination process. At the same time, the high humidity keeps everything from the growing medium to the delicate new taproot perfectly moist—a non-negotiable for a seed just breaking out of its shell.
Finding the Sweet Spot for Temperature and Humidity
To get your cannabis seeds to pop, you need to create an environment that feels like a perfect spring day. If it’s too cold, they’ll stay dormant, convinced winter is still hanging around. Too hot, and you risk cooking them before they even have a chance.
The same goes for humidity. If it’s too dry, that brand-new taproot can shrivel up in a matter of hours. The goal is to find that perfect balance and hold it steady. You’re essentially creating a five-star resort for your plants.
To nail this, it helps to know the specific targets for each early stage of growth. The needs of a brand-new sprout are a little different from a seedling that’s a week old.
Here’s a simple breakdown of the ideal conditions you’re aiming for.
Ideal Environment for Cannabis Seedlings
| Growth Stage | Ideal Temperature (°F) | Ideal Relative Humidity (%) | Key Goal |
|---|---|---|---|
| Germination | 70-80°F | 75-90% | Soften the seed shell and trigger sprouting. |
| Early Seedling | 68-75°F | 60-70% | Encourage root growth and initial leaf development. |
As you can see in the table, the needs change a bit once the seedling breaks the surface. The temperature can come down slightly, and you’ll want to gradually lower the humidity. This subtle shift helps prepare the plant for life outside the dome, encouraging its roots to grow stronger.
Maintaining these conditions is crucial, especially when you’ve invested in premium seeds. It ensures you’re giving those top-tier genetics the best possible start.
The goal is simple: use your humidity domes for seedlings to create a stable, nurturing space. Once your plants have their first set of true leaves, they’ll need more than just warmth and moisture. For tips on lighting, check out our guide on the right cannabis light schedule for seedlings to support their next phase of growth.
Troubleshooting Common Humidity Dome Problems
Even with the best intentions, you might hit a few bumps in the road with your new seedlings. Don’t sweat it—it happens to even the most seasoned growers. Most issues are easy to spot and even easier to fix once you know what to look for.
Think of it this way: most problems you’ll run into with a humidity dome boil down to too much moisture, not enough light, or just plain stubborn seeds. Let’s walk through how to diagnose the issue and get your little plants back on the right track.
Damping-Off: The Fuzzy Menace
You walk in one morning and your beautiful little seedlings have keeled over, looking thin and withered right where they meet the soil. If they look like they’ve been pinched, you’re almost certainly dealing with damping-off.
This dreaded fungal disease absolutely loves the wet, stagnant environment that a poorly managed humidity dome can create. It’s a classic case of too much of a good thing.
The fix is all about getting some fresh air in there, fast.
- Take the dome off immediately the moment you spot any seedlings looking weak at the base.
- If your dome has vents, crack them open as soon as your seeds sprout. This is your first step in gradually lowering the humidity.
- A small, gentle fan pointed near your tray (not directly at it) can do wonders for air circulation.
While high humidity is your best friend during germination, it can become an enemy once your plants are actually up and growing. For a deeper dive into this and other potential issues, check out our guides on identifying and managing common cannabis diseases and pests.
Leggy Seedlings and Other Common Issues
Another classic problem is “legginess.” This is when your seedlings shoot up tall and spindly, with stems that look too weak to support them. It’s a dead giveaway that they’re starving for light and desperately stretching to find it. The fix? Move your light source closer to the dome, but keep an eye on the temperature to make sure you aren’t cooking them.
What about seeds that just won’t pop? If a week has gone by with no signs of life, it’s time to play detective. Gently dig up one of the seeds. If it’s soft and mushy, it probably rotted from too much water. If it’s still hard, it might just be a late bloomer that needs a bit more time, warmth, or a touch more moisture.
Using a dome correctly makes a huge difference. Without one, some growers report losing 20-40% of their seedlings. Damping-off alone can wipe out nearly half the seedlings in an unprotected, overly moist setup. With proper dome use—meaning you vent it and remove it on time—that number plummets to under 5%.
The proof is in the results. One study found that 95% of seedlings grown under a humidity dome made it past the two-inch mark, compared to only 70% of those grown without one. You can discover more insights about humidity domes on EpicGardening.com and see just how effective they are at preventing these common frustrations.
When and How to Remove the Humidity Dome
Knowing when to remove the dome matters just as much as putting it on in the first place. Leave it on too long and you risk mold and weak, stretched stems. Take it off too soon and your seedlings can get shocked.
It’s really about timing and easing them into the change. This step, called hardening off, helps young plants adjust to lower humidity and normal temperature swings without stress.
Recognizing the Signs
So, how do you know when it’s time? The most important signal is the appearance of your seedling’s first set of true leaves.
Don’t get these mixed up with the first two little round leaves that pop out of the soil. Those are the cotyledons, and they’re basically a packed lunch that came with the seed. The true leaves will look like miniature versions of the iconic, serrated cannabis leaf you know and love.
Once you see that first set, it’s a sign that the seedling’s root system is developed enough to start pulling water from the soil on its own. It’s ready to start weaning off the dome.
Hardening off is your bridge between the nursery and the real world. The idea is to slowly reduce the plant’s dependence on the super-high humidity, toughening it up for life in the open air and preventing transplant shock.
A Gradual Schedule for Success
Whatever you do, don’t just rip the dome off and call it a day. That’s a recipe for disaster. The sudden drop in humidity can shock the plant, causing it to wilt and struggle. Instead, you’ll introduce your seedlings to their new environment over the course of about a week.
Here’s a simple, field-tested schedule that works like a charm:
- Days 1-2: Open the Vents. If your dome has vents, crack them open about halfway. This lets a little fresh air in and starts to bring the humidity down slowly.
- Days 3-4: Open Vents Fully. Now, open those vents all the way to maximize air exchange. Your seedlings are getting a real taste of the room’s ambient conditions.
- Days 5-6: Start Removing the Dome. It’s time for their first field trip. Take the dome completely off for a few hours each day. I’d start with two or three hours and add an hour or two each day.
- Day 7: Full Removal. By now, your seedlings should be standing strong and ready for the open air. You can officially remove the dome for good.
This slow-and-steady method is the key to building tough, resilient cannabis plants that are ready for their next stage of growth. Get this right, and you’re setting the foundation for a healthy, vigorous crop.
FAQs
How Long Should a Humidity Dome Stay On?
Keep the humidity dome on until your seedlings develop their first set of true leaves. Once those jagged-edged leaves appear, remove the dome and begin hardening them off to avoid excess humidity and issues like damping-off.
Do I Need a Vented or Non-Vented Dome?
When you’re starting cannabis seeds, a vented dome is almost always the way to go. Sure, a non-vented dome will trap that 100% humidity to get your seeds to pop, but that’s where its usefulness ends. A vented dome gives you far more control over the environment.
Vented Domes: You can gradually open the vents to slowly decrease the humidity inside. This makes for a much gentler hardening-off period, which means less shock to your young plants.
Non-Vented Domes: Your only option for airflow is to physically prop up or remove the entire dome. This causes sudden, drastic changes in humidity that can really stress out your seedlings.
If you have the choice, grab a vented model. That little bit of extra control is absolutely worth it.
What if Mold Starts Growing on My Soil?
Seeing some white, fuzzy stuff on the surface of your soil or starter plugs can be alarming. Don’t panic, but do act fast. It’s a dead giveaway that things are too wet and there isn’t enough air moving around. Your first move should be to take the dome off completely and let the surface of your growing medium dry out a bit. If you can, point a small fan nearby (not directly at the seedlings) to get some gentle air circulating across the tray. Catching it early usually solves the problem without any harm to your sprouts. It’s just another reminder of how critical airflow becomes once those seeds pop.