Auto")
 Auto")


Figuring out how to feminize seeds is really about taking full control of your garden. The whole point is to coax a female plant into producing pollen—pollen that’s genetically female—and then using that to pollinate another female. It’s a clever bit of plant science that results in seeds that are almost 100% guaranteed to grow into female plants, taking all the guesswork out of your grow.
Why Feminized Seeds Are a Game Changer for Growers
Let’s be honest, the end goal for most of us is a canopy packed with resin-drenched buds. That’s a job only female cannabis plants can do. Before feminized seeds hit the scene, every grow was a 50/50 shot in the dark. You’d spend weeks carefully feeding, watering, and lighting your plants, only to find that half of them were males. At that point, you had to pull them out immediately before they pollinated your females and ruined the entire harvest with seeds.
Feminized seeds completely changed the game by removing that gamble. Growers could finally dedicate their precious space and resources knowing every single plant had the potential to be a heavy producer. This wasn’t just about convenience; it was about making home growing fundamentally more efficient and dependable.
Maximizing Your Grow Space and Yield
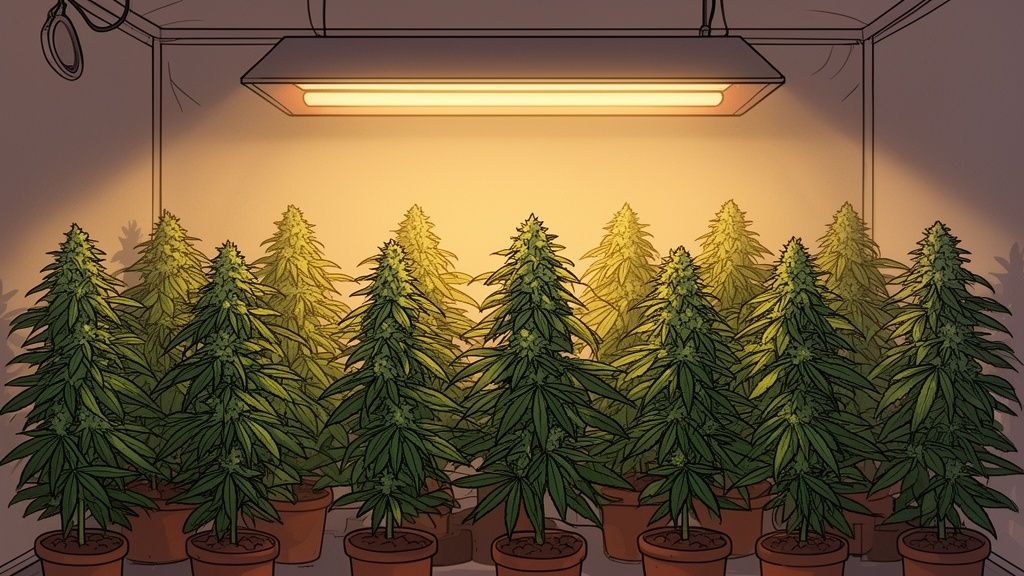
For home growers, space is always at a premium. Whether you have a small tent in the garage or a closet setup, every square foot is valuable. Feminized seeds let you make the most of it. Instead of popping ten regular seeds and crossing your fingers for five females, you can plant five feminized seeds and count on getting five bud-producing plants.
That efficiency directly impacts your bottom line: your final yield. More females in the same footprint simply means a bigger, better harvest. If you’re new to the concept, our guide explaining what feminized means in detail is a great place to start.
For a clearer picture, here’s a quick breakdown of how feminized seeds stack up against regular seeds.
Feminized Seeds vs Regular Seeds at a Glance
| Feature | Feminized Seeds | Regular Seeds |
|---|---|---|
| Female Plant Ratio | 99%+ female plants | Roughly 50% female, 50% male |
| Primary Use | Bud production (sinsemilla) | Breeding, finding new phenotypes |
| Effort & Resources | Highly efficient; no culling males | Less efficient; time/space wasted on males |
| Predictability | Very high; consistent results | Low; requires sexing and culling |
| Best For | Growers focused purely on flower harvest | Breeders, advanced growers |
As you can see, for anyone whose primary goal is harvesting smokable flower, feminized seeds are the obvious choice.
This level of reliability is why feminized seeds have come to dominate the industry. In fact, they accounted for a massive 48.9% revenue share of the global cannabis seeds market in 2024, which itself was valued at over USD 464 million. This preference says it all—growers overwhelmingly value the certainty that comes with an all-female crop.
The impact of this reliability is huge. It’s a game-changer for hobbyists, but even more so for medical patients who rely on a consistent, predictable supply of quality medicine. Knowing your crop will deliver is a massive relief.
Ultimately, starting with feminized seeds is the most direct and predictable path to a successful harvest full of the high-quality buds you’re looking for.
The Science Behind Making Female Pollen
Ever wonder how you can get a female cannabis plant—the one that’s supposed to grow buds—to produce pollen instead? It’s a pretty neat trick that growers have dialed in, and it all comes down to some clever plant biology. At its core, feminizing seeds is about intentionally stressing a female plant just enough to make it express male traits.
We’re essentially coaxing a genetically female plant (XX chromosomes) into growing male flowers. But here’s the genius of it: the pollen inside those flowers is still genetically female. Since the “father” plant is actually a female, it only has X chromosomes to pass on.
When you use that special pollen on another female plant, the resulting seeds get an X chromosome from both parents. That XX combination is the magic key, virtually guaranteeing every single seed will grow into a female plant ready to produce those resinous buds we’re all looking for.
The Role of Ethylene in Plant Sex
So, how do we actually pull off this gender switch? It all boils down to a plant hormone called ethylene. You can think of ethylene as the primary signal that tells a cannabis plant to develop female flowers. With normal ethylene levels, a female plant will happily churn out pistils and calyxes—the building blocks of a bud. To see what these look like up close, you can explore the different parts of the cannabis plant.
Our job is to throw a wrench in that process. By applying an ethylene blocker, we temporarily shut down the plant’s female expression. This hormonal shift puts the plant into a kind of survival mode, compelling it to try and self-pollinate by growing male flowers (pollen sacs).
It’s a crucial point to grasp: we are not genetically modifying the plant. We’re just using a temporary hormonal inhibitor to change how it grows. The underlying XX genetics stay exactly the same.
By blocking ethylene, you aren’t changing the plant’s DNA; you’re just changing its mind about what kind of flowers to grow. It’s a temporary intervention that allows us to collect the female pollen needed for creating feminized seeds.
How Stress Triggers Male Flowers
What we’re doing here is really just a highly controlled form of stress. Out in the wild, a female plant that’s nearing the end of its life without getting pollinated might pop out a few male flowers on its own. It’s a last-ditch effort to pass on its genes. We’re just hijacking that survival instinct and applying it with precision using specific chemical agents.
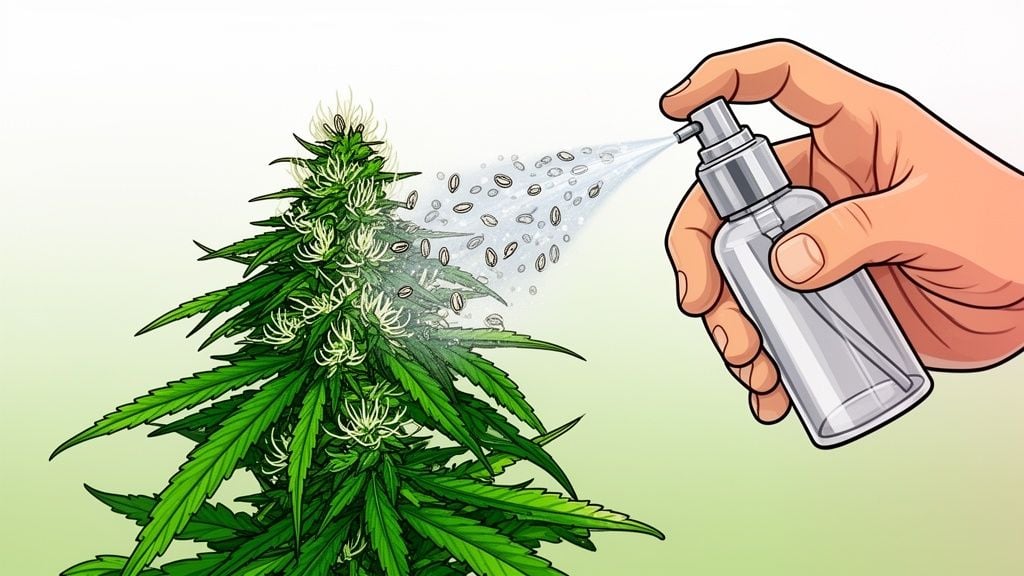
The most common and reliable methods involve spraying a female plant with solutions that inhibit ethylene. These solutions, which we’ll get into detail on later, basically tell the plant to pause female flower production and kickstart male flower development instead.
Understanding the “why” makes the “how” feel much more straightforward. You’re not performing some kind of botanical magic; you’re simply working with the plant’s natural responses to guide its reproductive cycle. This is the foundational knowledge that separates a successful breeding project from a frustrating failure, giving you total control over the outcome.
Your Shopping List for DIY Feminized Seeds
So, you’re ready to roll up your sleeves and try making your own feminized seeds. Fantastic. Like any good project, getting your gear lined up first is half the battle. It’s what separates a smooth run from a frustrating mess that could put your main crop at risk.
We’ll focus on the two most common methods that home growers swear by: colloidal silver (CS) and silver thiosulfate solution (STS). Let’s get your toolkit sorted.
Sourcing Your Silver Solution
The magic ingredient for either method is, you guessed it, silver. But how you get it and what form it’s in depends entirely on the path you choose.
If you’re going the colloidal silver (CS) route, you can either buy it ready-to-go or make it from scratch. Buying it is definitely easier. The most important thing to check is the concentration. You’re looking for a solution that’s at least 30 Parts Per Million (PPM). Anything weaker just won’t have the punch needed to stop ethylene production and force out those male flowers, meaning you’ll be spraying more for a lower chance of success.
Feeling adventurous? You can make your own CS with a colloidal silver generator, pure silver rods, and distilled water. It’s a bit of an investment upfront, but if you see yourself doing this regularly, it pays for itself pretty quickly.
For the silver thiosulfate solution (STS) method, you’ll be playing chemist and mixing your own solution. This is the method most pros use because it’s more stable and packs a bigger punch. You’ll need to buy two things:
- Silver Nitrate: This is your source of silver, usually sold as a powder or in crystals.
- Sodium Thiosulfate: This is the stabilizer that helps the plant actually absorb the silver nitrate effectively.
You can find both of these at online chemical supply stores or even on sites like Amazon. Just make sure you’re buying high-purity chemicals to get the most reliable results.
Essential Safety and Application Gear
Now, a serious note. When you’re working with these solutions—especially STS—you need to treat them with respect. This isn’t just glorified plant food.
This is one area where you absolutely should not cut corners. Silver solutions are not good for you. Always, always wear gloves and eye protection when you’re mixing and spraying. The last thing you need is skin irritation or an accidental splash in the eye.
Here’s a quick rundown of the other gear you’ll need to have on hand:
- A Good Spray Bottle: I can’t stress this enough. Don’t grab a cheap, leaky dollar-store bottle. You need a fine, even mist to properly coat the branches without just soaking everything. An amber or dark-colored bottle is a great choice because it’ll protect your solution from breaking down in the light.
- Protective Gloves: Simple nitrile gloves are perfect. They’ll keep the chemicals off your skin while you work.
- Safety Goggles: Protect your eyes. It only takes one stray droplet to ruin your day, especially when you’re handling the raw silver nitrate powder.
- A Separate, Dedicated Space: This is non-negotiable. You have to isolate the plant you’re spraying. A small grow tent or even a cleared-out closet works perfectly. If you let that feminized pollen drift over to your main flower crop, you’ll end up with a tent full of seedy buds instead of the sinsemilla you worked so hard for.
Getting all this stuff ready before you begin makes the whole process of feminizing seeds feel way more controlled and a lot less chaotic. It’s all about setting yourself—and your plants—up for success.
Using Colloidal Silver to Create Feminized Seeds
Let’s dive into the most common method for making your own feminized seeds: colloidal silver, or CS as most growers call it. This is the go-to for a reason. It’s reliable, the materials are easy to find, and once you get the hang of the timing, the process is pretty straightforward.
Your first move is to pick the right plant to “reverse.” You’re looking for the star of the show—your healthiest, most vigorous female. A robust plant will handle the stress of the reversal process much better and, more importantly, will produce a ton of viable pollen. This is not the time to choose the runt of the litter.
Timing Your Colloidal Silver Application
In this game, timing is everything. You have to start spraying your chosen female the moment she begins to switch into her flowering stage. If you’re growing indoors, that’s day one of flipping your lights to a 12/12 schedule. For outdoor growers, you’ll start spraying when you spot the very first signs of pre-flowers—those tiny white pistils popping out at the nodes.
Begin spraying the branch you want to reverse (or the whole plant, if you’ve got it isolated) once a day, every day. You’re aiming for a thorough misting that coats the target area completely, but you don’t want it dripping wet. Consistency is your best friend here. Miss a day, and you could set the whole project back.
The biggest mistake I see people make is starting too late or getting lazy with the daily spraying. Colloidal silver works by inhibiting the plant’s ethylene production, which is a key hormone for female flower development. If you skip a day, the plant’s natural hormones can take over again, and you’ll lose all that progress.
Keep up this daily ritual for about two to three weeks. Eventually, you’ll start to see a change. Instead of the familiar white pistils, you’ll see small, round green balls forming. Those are the male pollen sacs you’ve been working for. Once they’re clearly visible all over the treated areas, you can stop spraying.
Harvesting and Using Feminized Pollen
Now, it’s a waiting game. Those pollen sacs need to mature, which can take another couple of weeks. You’ll know they’re ready when they swell up and start looking like tiny yellow bananas. Some might even start to crack open on their own. Be patient—harvesting too early means you’ll end up with immature, useless pollen.
Collecting the pollen requires a steady, careful hand. The last thing you want is that fine yellow dust getting all over your grow room and pollinating your entire crop by accident. A great trick is to gently place a clean, dry Ziploc bag over the reversed branch and give it a good shake. The mature sacs will burst and release the pollen right into the bag. Alternatively, you can snip the entire branch, take it to a separate, clean workspace, and tap the flowers over a sheet of parchment paper.
The simple toolkit you’ll need for this DIY project is shown below.
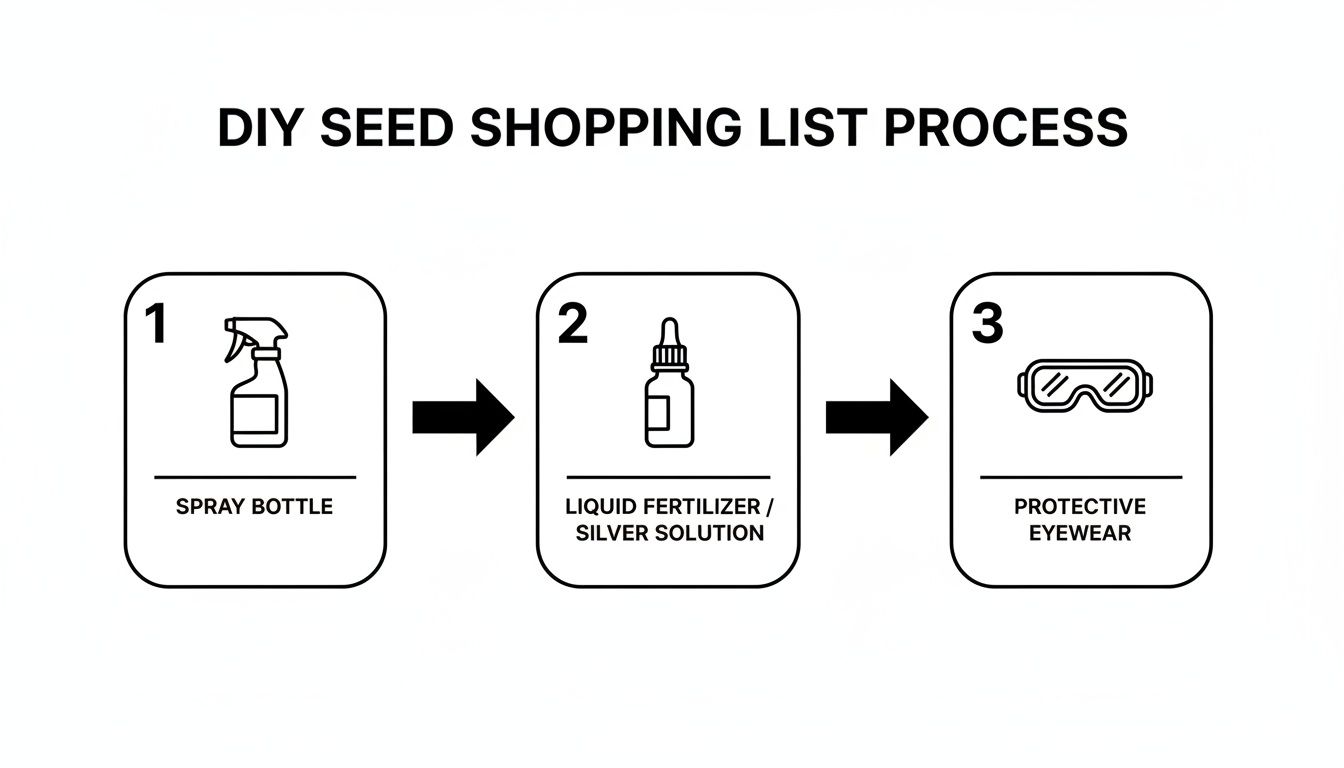
As you can see, beyond the silver solution itself, your most important tools are a good sprayer and your own safety gear.
With your pollen collected, grab a small, soft-bristled paintbrush or a Q-tip. Gently “paint” the pollen onto the pistils of the female plant you want to seed. The sweet spot for pollinating a female is around 2-3 weeks into her flowering cycle, right when her pistils are bright white and sticking straight out, eagerly waiting.
The fact that feminized seeds dominate the market today is a direct result of growers perfecting techniques just like this one. Since the early 2000s, using a 30-50 ppm colloidal silver solution has become the industry standard for producing the all-female seeds that fuel the home and medical growing scenes across the U.S. It’s a reliable method that allows seed banks to offer premium genetics with confidence. For those interested in the business side, you can find more insights about the cannabis seed industry and its incredible growth.
A Pro Tip for a Dual Harvest
Here’s a little trick I’ve picked up over many grows. You don’t have to write off an entire plant just to make seeds. By selectively pollinating just a few of the lower, less-developed branches on your “mother” plant, you can truly have the best of both worlds.
This smart approach lets you:
- Harvest Seeds: The pollinated lower branches will develop into a nice little batch of your very own feminized seeds for future grows.
- Harvest Bud: The top colas and the rest of the unpollinated branches will continue to develop into the seedless, high-quality sinsemilla you’re looking forward to smoking.
This is an incredibly efficient way to breed at home. It maximizes your space and rewards you with a great return on your efforts—a stash of bud for now, and a library of seeds for later.
Exploring STS and Other Feminizing Methods
While colloidal silver is a fantastic starting point for home growers, it’s not the only tool in the shed for creating feminized seeds. If you’re looking for what the pros use, it’s time to get familiar with Silver Thiosulfate Solution (STS). It requires a bit more prep work, but the results speak for themselves.
Think of STS as the concentrated, more stable big brother to colloidal silver. Its stability is a huge plus because it works far more efficiently. Instead of spraying your chosen female plant every single day, a couple of well-timed applications are usually enough to trigger the development of male flowers. That’s a massive time-saver.
The Power of Silver Thiosulfate Solution
To make your own STS, you’ll need to mix two key ingredients: Silver Nitrate and Sodium Thiosulfate. You can typically find these at online chemical supply shops or specialty garden stores. The process involves preparing two separate solutions in distilled water before carefully combining them to create the final spray.
Let me be clear: safety is non-negotiable here. When you’re mixing and spraying STS, you absolutely must wear gloves and protective eyewear. This solution is far more potent than the pre-made colloidal silver you can buy off the shelf.
Once you’ve mixed it, the application process is quite similar to the CS method. You’ll spray your target female—either the whole plant or just a few branches—right as it starts to show the first signs of flowering. The big difference is frequency. You’ll likely only need one good spray at the start of the flowering cycle, followed by a second application about a week later. In my experience, the plant responds much faster and more reliably with STS.
STS is the industry standard for a reason. Its effectiveness and stability deliver more consistent results with less day-to-day effort. For anyone serious about producing feminized seeds on a regular basis, learning to use STS is a game-changer.
Rodelization: The All-Natural Method
On the complete opposite end of the spectrum, we have rodelization. This is the hands-off, chemical-free approach to feminizing seeds. It’s less of a deliberate technique and more of a natural phenomenon you allow to happen.
Rodelization plays on a female plant’s powerful survival instinct. When a mature female plant goes long past its ideal harvest window without being pollinated, it can become stressed. In a last-ditch effort to pass on its genetics, some strains will spontaneously produce their own male pollen sacs.
The “method” is as simple as it sounds: just let a female plant live for a few extra weeks past her prime. If you watch closely, you might spot a few small, banana-shaped male flowers (often called “nanners”) emerging directly from the buds.
The major drawback? It’s incredibly unpredictable. Not all cannabis strains will do this, and even those that do typically produce a very small amount of pollen. It’s more of a fascinating botanical quirk than a dependable breeding strategy. You might get a handful of seeds, but you won’t get the kind of volume you need for a serious project.
So, how do all these methods stack up against each other? Here’s a quick breakdown to help you decide which approach is right for your goals.
Comparing Feminization Methods
| Method | Effectiveness | Difficulty | Best For |
|---|---|---|---|
| Colloidal Silver | High | Low | DIY home growers wanting a simple, reliable method. |
| STS | Very High | Medium | Serious breeders or growers wanting professional-grade results. |
| Rodelization | Very Low | Very Low | Hobbyists curious about natural methods with no set expectations. |
Ultimately, choosing the right path comes down to what you want to achieve. If you’re just dipping your toes into breeding, colloidal silver is a fantastic and manageable entry point. If you’re looking to scale up or demand maximum efficiency, STS is your best bet. And rodelization? It’s a fun experiment, but don’t count on it if a reliable harvest of feminized seeds is your end goal.
When Buying Feminized Seeds Is the Better Move

Creating your own feminized seeds is a fascinating project, no doubt about it. But let’s be honest—it’s not for every grower. It takes a serious commitment of time, a meticulous eye for detail, and, crucially, a completely isolated grow space to avoid accidentally pollinating your entire flower crop.
Sometimes, the simplest and most effective solution is to buy professionally bred feminized seeds from a source you trust. It might not have the same DIY appeal, but what you’re really investing in is predictability and quality that can take a breeder years to perfect.
The Value of Professional Genetics
When you purchase from a reputable seed bank, you’re getting more than just a seed. You’re getting the culmination of years of intensive labor. Expert breeders pour countless hours into stabilizing their genetic lines, which translates directly to plants with reliable and consistent characteristics.
So, what does that consistency actually mean for your garden?
- Vigor and Stability: Professionally bred seeds are far less likely to develop hermaphroditic traits, even when faced with common growing stressors.
- Predictable Traits: You can have confidence that the high THC levels or the specific terpene profile you’re after will actually materialize.
- Guaranteed Performance: Many top-tier seed banks offer germination guarantees, which removes a lot of the financial risk from your grow.
This kind of reliability is exactly why the industry has boomed. The methods used to feminize seeds, often involving chemical agents like colloidal silver, have fueled massive growth in the cannabis seed market. According to Market Research Future, the global market was valued at USD 1.4 billion in 2024 and is projected to soar to USD 6.501 billion by 2035. Feminized seeds are the driving force behind this growth, especially in North America. For a deeper dive into these numbers, you can read the full cannabis seeds market report.
For a beginner grower, or really anyone who just wants a guaranteed harvest without the hassle of a complex science experiment, buying seeds is the most direct route to success. It saves you the potential headache and crop failure of a DIY attempt.
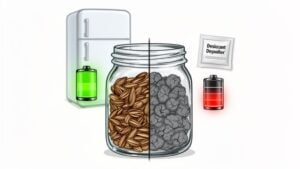
In the end, it all boils down to your goals. If the challenge of a breeding project truly excites you, then absolutely give it a shot! But if your primary objective is to fill your jars with top-shelf, seed-free cannabis, letting the pros handle the genetic work is a smart decision.
You can confidently buy top-tier cannabis seeds that are primed to deliver exceptional results right out of the pack.
Common Questions About Feminizing Seeds
When you first start digging into how to make your own feminized seeds, the same questions almost always come up. It makes sense—you want to be sure about what you’re doing before you start spraying your prized plants. Let’s walk through the most common queries so you can get started with a clear head.
Is the Sprayed Plant Safe to Consume?
This is probably the most critical question, and the answer is a firm, unequivocal no. Never, ever smoke, vape, or ingest any part of a plant that’s been treated with colloidal silver or silver thiosulfate (STS).
This is precisely why you need to isolate your breeding project. The best-case scenario is having a completely separate female plant that you dedicate solely to producing pollen. If you’re working with limited space, a common workaround is to treat just one or two lower branches. That way, the rest of the plant remains untouched and perfectly safe to harvest and enjoy.
Think of the sprayed plant or branch as a tool, not a part of your harvest. Its only job is to give you pollen. Once you’ve collected it, that plant material should be carefully thrown away.
How Many Seeds Will I Get?
Everyone wants to know what kind of yield to expect. The honest answer? It varies—a lot. A single, thoroughly pollinated branch can produce several hundred seeds, while a quick, light dusting might only give you a handful.
The final number really hinges on a few key things:
- Pollen Quality: Was the pollen you gathered healthy and viable?
- Timing is Everything: Did you pollinate the female when her pistils were fresh and most receptive? This sweet spot is usually around 2-3 weeks into the flowering cycle.
- Pollination Technique: How well did you actually apply the pollen to the target buds?
Remember, a tiny bit of pollen goes an incredibly long way. It’s actually much easier to overdo it than underdo it. Unless you’re trying to turn an entire plant into a seed factory, start with a light touch. You’ll be surprised.
Are My DIY Seeds as Good as a Seed Bank’s?
Can your homemade seeds be as good as the ones from a professional seed bank? Absolutely. The seeds you make will be a direct genetic copy of their parent. If you start with a stable, high-quality, elite clone, you can create some fantastic seeds yourself.
The real difference, and the advantage of buying from a reputable seed bank, is the rigorous work they do behind the scenes. Professional breeders spend years, sometimes even decades, selecting, crossing, and stabilizing their genetics. They’re hunting for vigor, consistency, and a total absence of negative traits like hermaphroditism.
When you buy from them, you’re not just getting a seed; you’re getting the assurance that it comes from a proven, stable lineage. That’s a level of quality control that’s pretty tough to replicate in a home grow.
For growers who value guaranteed results and want to skip the entire breeding experiment, checking out the lab-tested genetics from Growers Choice Seeds is the way to go.