Auto")
 Auto")


So, you’ve got your seeds, and you’re ready to get growing. The first big question on every grower’s mind is, “How long is this really going to take?”
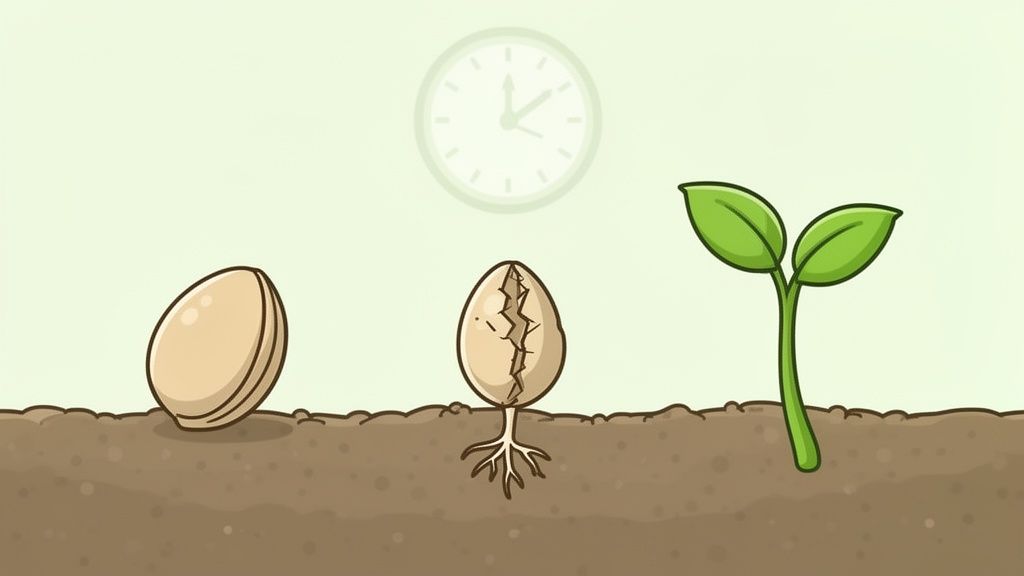
Generally, you can expect to see signs of life in anywhere from 24 hours to 7 days. Some seeds are just eager to get started and will pop open in a day, while others are a bit more stubborn. Most, however, will sprout somewhere within that first week.
Setting Expectations for Cannabis Seed Germination
Think of it like making a bag of popcorn. A few kernels pop right away, then the majority follow in a big burst, and you always have a few duds at the very end. This kind of variation is completely normal with cannabis seeds. The exact timing really boils down to two things: the seed’s genetics and the germination method you’re using.
Your one and only goal during this phase is to see the radicle—that tiny white taproot—break out of the seed shell. That little root is the first sign of life and your cue that the seed has woken up and is on its way to becoming a plant. Once you see it, you’re officially in business.
The Foundation of a Fast Start
Of course, none of this matters if you’re working with duds. The absolute best way to guarantee a fast and successful germination is to start with high-quality, fresh seeds from a source you trust. It takes so much of the guesswork out of the process.
When you start with lab-tested genetics like the ones from Growers Choice Seeds, you’re giving yourself a serious head start. Their 90% germination guarantee isn’t just a marketing slogan; it’s a direct reflection of their confidence in the seed’s viability. This level of quality means you can focus on nurturing a new seedling instead of wondering if your seed will even pop.
For any grower, the waiting game is the hardest part. But patience in this first week is everything. If you start getting anxious after day two and begin poking and prodding, you can easily screw something up. Just give your seeds a stable, warm, and moist environment, and let them do their thing.
For a quick reference, here’s what you can generally expect from different types of cannabis seeds when conditions are just right.
Quick Guide to Cannabis Seed Germination Timelines
| Seed Type | Typical Germination Time | Best For |
|---|---|---|
| Autoflower Seeds | 24 – 72 hours | Growers seeking a fast, simple grow cycle from start to finish. |
| Feminized Seeds | 48 – 120 hours (2-5 days) | Cultivators wanting guaranteed female plants and consistent results. |
| Regular Seeds | 72 – 168 hours (3-7 days) | Breeders and experienced growers looking for genetic diversity. |
This table gives you a solid baseline, but remember that genetics and your environment play the lead roles in the final timeline.
What Science Says About Speeding Things Up
While growers have relied on traditional methods for decades, it turns out we can actually give nature a helping hand. For years, a 4 to 7 day wait was considered perfectly normal. But what if you could shrink that timeline?
Recent research has shown that by fine-tuning the germination environment, you can get things moving much, much faster. One study discovered a specific protocol that prompted radicles to appear in just one day, with seedlings ready to plant in as little as 3 to 7 days. This method cut the typical germination window by up to 80% compared to just using plain water. If you’re curious about the specifics, you can explore the full study on this accelerated germination process to see how they did it.
Why Some Seeds Sprout Faster Than Others
Ever popped a few seeds and wondered why one shoots out a taproot in a day while its neighbor just sits there, doing nothing? It’s a classic head-scratcher for growers, but the answer almost always boils down to two things: the seed’s age and its overall quality. A faster or slower start is rarely a random event.
Think of a premium, fresh seed like a world-class athlete in their prime. It’s brimming with energy, genetically wired for peak performance, and just waiting for the starting gun. Give it the right environment, and it explodes off the block, often showing a taproot in just 24 to 48 hours.
An old or poorly stored seed, on the other hand, is like that same athlete years after they’ve retired. The potential might still be buried in there, but its energy reserves are low. It’s going to need a lot more coaxing to get moving and might not have the same vigor even if it does sprout.
The Critical Role of Seed Freshness
When it comes to a quick, successful start, freshness is everything. A seed is a tiny, living thing with a finite amount of stored energy—like a battery pack—to fuel its initial burst of life. The fresher the seed, the more juice is left in that battery.
This is why freshly harvested seeds from top-tier genetics often have over 90% germination rates. But that success rate can plummet over time, especially with poor storage. Some studies on hemp seeds have shown germination can drop by a staggering 50% after just one year. It’s a stark reminder of why the best seed banks hand-inspect, wash, and sanitize every batch to lock in maximum viability.
This natural decline in energy is precisely why starting with seeds from a recent, well-managed harvest gives you such a massive head start. They simply haven’t had time to degrade, ensuring they have all the power they need for a fast, forceful emergence.
How Proper Storage Preserves Potential
So, what do you do if you buy seeds in bulk or want to save some amazing genetics for a future grow? This is where proper storage becomes your secret weapon. Storing seeds correctly is like putting them into suspended animation; it dramatically slows the aging process and preserves their potential for years.
To keep your seeds in peak condition, you just need to control three simple environmental factors:
- Keep Them Cool: Heat is the enemy. It speeds up a seed’s metabolism, forcing it to burn through its precious energy reserves way too quickly. A standard refrigerator is a perfect spot.
- Keep Them Dark: Light is a signal for seeds to start growing. Exposing them to light while in storage can mess with their internal clock and degrade their viability over time.
- Keep Them Dry: Moisture is the primary trigger for germination. Any humidity can trick a seed into thinking it’s time to sprout. If the conditions aren’t right for it to continue, it can lead to mold or a failed start.
Think of a seed as a tiny, self-contained life-support system. By keeping it cool, dark, and dry, you’re basically hitting the pause button, making sure it’s fully charged and ready to go whenever you are.
This same attention to detail is what separates a reputable seed vendor from the rest. The best suppliers, like us at Growers Choice Seeds, don’t just toss seeds in a bag. We hand-inspect each one to check for cracks or immaturity, then sanitize them to remove potential contaminants. This strict quality control ensures you get a clean, healthy, and vigorous seed that’s primed for success from the moment it arrives.
For a deeper dive into making your seeds last, check out our guide on cannabis seed storage.
Creating the Perfect Environment for Germination
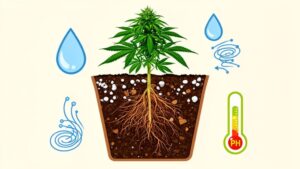
Think of your cannabis seeds as tiny, dormant powerhouses. They’re just waiting for the right wake-up call to spring into action. If you want a fast, successful start to your grow, your number one job is to provide that perfect wake-up call.
Nailing the environment from day one is the single best way to shorten germination time and kickstart a healthy growth cycle. It really boils down to two key factors: temperature and moisture. Get these right, and you’re sending a clear signal to the seed that it’s go-time.
Finding the Temperature Sweet Spot
You know how some things just need to be just right? That’s your seeds with temperature. They’re looking for a cozy, warm spot that tells them spring has arrived. Too cold, and they’ll stay asleep. Too hot, and you risk cooking them.
The ideal range you’re shooting for is between 70-85°F (21-29°C). This warmth keeps the seed’s internal engine humming, encouraging it to crack open and send out that first critical taproot.
Consistency is key here. Wild temperature swings can confuse and stress the seed, causing major delays. Studies show that seeds kept in this cozy range typically sprout in a quick 2-5 days. Let the temps dip too low, and you’ll be waiting a lot longer.
The Damp, Not Drowning Rule
When it comes to water, your mantra should be damp, not drowning. A seed needs moisture to soften its hard outer shell and trigger the hormones that initiate growth. But it also needs to breathe.
If a seed is completely submerged in water for too long, it can’t get oxygen and will essentially suffocate. Think of it like a wrung-out sponge—that’s the level of moisture you want. The growing medium should feel consistently moist to the touch, but never waterlogged or sitting in a puddle.
Popular Germination Methods Explained
Once you’ve got your temperature and moisture plan sorted, it’s time to choose your method. There are a few tried-and-true techniques that growers have relied on for years. There’s no single “best” way; it’s all about finding what you’re comfortable with and what suits your setup.
Here are the top three approaches:
- The Paper Towel Method: A total classic for a reason. This method lets you physically see the taproot emerge, so there’s no guesswork about when it’s ready to plant.
- Directly in Soil: This is the most natural route. It completely avoids the stress of transplanting a fragile seedling, allowing it to establish its roots in its final home from the get-go.
- The Water Glass Method: Some growers like to give their seeds a head start by soaking them in a glass of water for 12-24 hours. This can help soften up particularly tough seed shells before moving them to soil or a paper towel.
No matter which method you pick, remember to be gentle. That little white taproot is the most fragile part of the plant’s life. Once it appears, handle it with extreme care—or not at all, if you can help it!
Let’s do a quick run-through of the ever-popular paper towel method:
- Get Set Up: Lightly moisten two paper towels with room-temperature water. Squeeze out any excess—they should be damp, not dripping.
- Place Your Seeds: Lay one towel on a plate. Carefully place your seeds on top, giving them at least an inch of space from each other.
- Tuck Them In: Gently place the second damp paper towel over the seeds.
- Create Darkness: Cover the whole setup with a second plate, flipped upside down, to create a dark, humid dome.
- Keep It Warm: Find a consistently warm and dark spot, like the top of your refrigerator or inside a kitchen cabinet.
- Check Daily: Once a day, lift the top plate to check on your seeds. If the towels feel like they’re drying out, give them a light spritz with a spray bottle. Once you see a taproot about a quarter-inch long, it’s time to carefully plant it.
After your seeds have successfully sprouted, the next critical step is giving them the right light. You can learn more about the ideal cannabis light schedule for seedlings to ensure they thrive.
How Strain Type Affects Germination Timelines
When you’re trying to pin down a germination timeline, one of the biggest clues is the seed’s type. It’s a lot like knowing the difference between a golden retriever and a greyhound—they’re both dogs, but they’re wired very differently. Thinking all cannabis seeds will pop on the same schedule is a setup for unnecessary stress.
The good news is that it’s simpler than you might think. Once you know which category your seed belongs to, you can set a realistic timeline and know exactly what to look for. It’s not about one type being “better,” but about understanding its natural rhythm so you can give it what it needs.
Autoflowers: The Sprinters
If patience isn’t your strong suit, autoflower seeds will feel like a perfect match. These are the sprinters of the cannabis world, genetically programmed for speed and efficiency. Their secret ingredient is ruderalis heritage—a tough-as-nails subspecies from Siberia that evolved to race from seed to flower in a very short season.
That built-in urgency kicks in right from germination. It’s totally normal to see an autoflower crack open and send out its taproot in as little as 24 to 72 hours. Most will be ready to go within a 2-5 day window. They just don’t have time to mess around, which makes them a fantastic choice for growers who want a quick turnaround. If you’re looking for a fast and straightforward grow, check out the wide variety of autoflowering cannabis seeds available and see how they can shorten your entire cultivation calendar.
Feminized Seeds: The Reliable Marathoners
Feminized seeds are the dependable workhorses of the growing world. They’re specifically bred to produce only female plants, which eliminates the guesswork for anyone focused on harvesting smokable flower. While they don’t have the lightning-fast pace of autoflowers, their germination timeline is wonderfully consistent.
You can usually expect feminized seeds to sprout within 3 to 7 days. They take a little longer to wake up because they aren’t on that same accelerated, race-against-the-clock schedule. This slightly longer window is perfectly fine and gives them a steady, strong start before they head into their vegetative growth phase. Think of them as marathon runners—they pace themselves for the long journey ahead.
It’s a common myth that a seed’s future cannabinoid profile influences germination. Growers often wonder if a high-THC seed will pop faster than a high-CBD one. The simple answer is no. A seed’s potential cannabinoid content has zero to do with how quickly it sprouts.
So, what actually makes a difference? It all comes back to the fundamentals.
Cannabinoid Content Does Not Influence Germination
Let’s put this one to rest for good. The time it takes for a seed to germinate has absolutely nothing to do with whether it will one day produce high levels of THC or CBD. At this early stage, a seed is just a seed—a tiny genetic time capsule. Its programming for cannabinoids won’t kick in until much later.
A high-CBD strain and a high-THC strain from the same breeder, with the same freshness and quality, will germinate at more or less the same rate. The real factors that drive a successful and timely start are always the same:
- Genetics: Is it an autoflower, feminized, or regular seed? This sets your baseline expectation.
- Seed Health: Is the seed fresh, mature, and stored properly? This determines its vitality.
- Environment: Are you providing consistent warmth and moisture? This is the signal that tells the seed it’s time to grow.
Ultimately, whether your goal is therapeutic relief or potent recreational effects, your job during germination is identical. Give your seeds the best possible start, and they’ll reward you with a healthy seedling, no matter their future chemical makeup.
Troubleshooting Slow or Failed Germination
It’s day seven, and you’re staring at your pots, seeing nothing but soil. No little green heads popping up. It’s easy to feel a bit of panic, but don’t toss them out just yet. More often than not, a slow start is just a sign that something in the environment needs a small tweak to get things moving.
Before you write the seed off as a dud, let’s run through a quick diagnostic check on the usual suspects. Think of this as a process of elimination to figure out what might be holding your seeds back. A delayed germination time for seeds is almost always a solvable problem.
Checking Your Germination Environment
The first place to look is always the seed’s immediate surroundings. These little guys are incredibly sensitive, and even slight changes can slam the brakes on their growth. Let’s start with the basics.
Did the temperature drop overnight? Seeds need consistent warmth, ideally somewhere between 70-85°F, to wake up. If your grow space gets chilly, a simple seedling heat mat tucked under your germination tray can provide that gentle, steady warmth they crave.
Next, take a look at your moisture levels. If you used the paper towel method, did the towels dry out? Even a few hours of being too dry can stall everything. On the flip side, are they sitting in a puddle? Seeds need to breathe, and too much water will suffocate them before they even have a chance. The sweet spot is always consistently damp, never soaking wet.
Common Planting and Handling Mistakes
If your environment checks out, the issue might be something that happened during planting. These are really easy mistakes to make, especially for new growers.
One of the most common slip-ups is planting the seed too deep. A seed only has a limited amount of stored energy to push its first shoot up toward the light. As a rule of thumb, never plant it more than a quarter to a half-inch deep. Any further down, and it might run out of gas before it ever breaks the surface.
Handling the delicate taproot is another tricky spot. That first little white root is the seedling’s lifeline, and it’s incredibly fragile. If it gets damaged while you’re moving it from a paper towel to its pot, the shock can stun the seedling and halt its growth. This is exactly why many seasoned growers prefer to plant directly into soil, skipping that risky transfer altogether.
Sometimes, even when you do everything right, a seed just won’t pop. It’s a natural part of gardening. This is where you really see the value of starting with high-quality, tested genetics.
Knowing When to Call It
So, when is it officially time to give up on a seed? If you’ve corrected any environmental issues and have waited at least 10 to 14 days without seeing any sign of life, it’s probably not going to happen. You can often tell by feel—a non-viable seed will feel mushy or crush easily between your fingers, a sure sign it was never meant to be.
This is the exact moment you’ll be glad you bought from a reputable source. A failed seed from a premium supplier like Growers Choice Seeds isn’t a total loss; it’s just a quick customer service issue. Their 90% germination guarantee turns a potential disappointment into a simple replacement, giving you the confidence to try again without being out of pocket. It’s a safety net that lets you focus on your grow, not on a gamble.
Your Simple Germination Success Plan
Alright, let’s bring everything we’ve talked about into a simple, straightforward game plan. Think of this as your pre-flight checklist. Getting this first step right is critical—it sets the tone for your plant’s entire life cycle, so a little focus now pays huge dividends down the road.
The whole thing feels a lot less intimidating when you boil it down to a few core rules. Stick to these, and you’ll not only see more of your seeds pop, but you’ll probably see them pop faster. It’s all about creating the perfect “welcome home” for that tiny taproot.
Your Germination Checklist
These are the four pillars of successful germination. Get these right, and you’re building a rock-solid foundation for a healthy plant.
-
Start with Premium Seeds: This is non-negotiable. You can have the perfect setup, but you can’t will a dud seed to life. Starting with high-quality, lab-tested genetics from a reputable source like Growers Choice Seeds is the single most important decision you’ll make.
-
Maintain Consistent Warmth and Moisture: Seeds crave a cozy, stable home. You want to keep them in that sweet spot between 70-85°F (21-29°C). Just as important, they need to stay damp, but never soaking wet. Think “moist sponge,” not “puddle.” A simple seedling heat mat can be your best friend here.
-
Pick Your Method and Stick with It: Whether you’re a fan of the paper towel method, planting straight into the soil, or using starter plugs, choose one and commit. Overthinking it or changing your approach halfway through just creates stress for you and the seed.
-
Be Patient and Hands-Off: Honestly, this is the hardest part for most growers. Once you’ve set them up, let them be. The constant urge to poke, check, and prod them every few hours does more harm than good. Trust the process and let nature work its magic.
That initial germination window might only be a few days, but its impact lasts a lifetime. The health and energy your seed shows right out of the gate directly translate to a stronger seedling, a more robust plant in veg, and a better harvest in the end.
By following this simple plan, you’re taking the guesswork out of the equation. You’re not just crossing your fingers and hoping for success—you’re actively creating the conditions for it. You now have the know-how to turn what can be an anxious waiting game into a confident first step on an awesome growing journey.
Ready to skip the guesswork and start with seeds you can count on? At Growers Choice Seeds, we hand-inspect every single seed for viability and stand behind them with a 90% germination guarantee. Find your perfect strain today at https://www.growerschoiceseeds.us.
FAQs
My Taproot Emerged but Is Not Growing—What Should I Do?
It’s definitely frustrating to see a taproot emerge and then just… stop. When this happens, it’s almost always an environmental issue that you can correct.
First, check your moisture levels. The most common culprit is overwatering. If the medium is soaked, that tiny root is literally drowning. You’re aiming for damp, like a wrung-out sponge, not soaking wet.
Next, check the temperature. If it’s too cold, the seed’s metabolism will slow to a crawl. Moving it to a warmer spot can often kick things back into gear. Also, remember that new taproot is incredibly delicate. If you’ve already planted it, make sure it’s buried no more than a half-inch deep. If you’ve fixed these things and still don’t see any progress in a day or two, the seedling might just not have the energy to make it.
Does Germination Time Affect the Final Yield?
That’s a great question, but the short answer is no, not really. A seed that takes five days to sprout can absolutely grow into a monster plant that’s just as productive as one that popped in 48 hours.
Think of germination time as a sign of a seed’s initial get-up-and-go. The real factors determining your final harvest are everything that comes after that point. Your light, nutrients, watering schedule, and training techniques during the veg and flower stages are what truly pack weight onto your buds. A quick start is nice, but it’s the strong finish that fills the jars.
What Is the Absolute Fastest Way to Germinate Seeds?
When you want to see that little white taproot pop as fast as humanly possible, nothing beats the one-two punch of the paper towel method paired with a seedling heat mat.
The damp paper towel provides constant, perfect moisture, and the heat mat keeps the temperature right in that 75-80°F (24-27°C) sweet spot. That consistent warmth basically tells the seed it’s time to get to work, speeding up all the internal processes. Using this combo, plenty of growers see a taproot emerge in as little as 24 to 72 hours.