Auto")
 Auto")


When people talk about growing top-shelf cannabis, they usually picture some high-tech indoor setup with crazy lights. But let’s be real—nothing beats the raw power of the sun. The best outdoor grow setup isn’t about dropping a ton of cash on gear; it’s about working with nature to get killer results.
Why Growing Outdoors Is a Game Changer
Forget the idea that you need a perfectly sealed-off room to grow amazing flower. Any experienced grower will tell you the sun offers a power and light spectrum that no bulb can truly copy. It’s about working smarter, not harder, and letting nature do the heavy lifting.
This isn’t just some fringe idea; it’s a major shift in how people are growing. Back in 2016, a whopping 80% of commercial growers were stuck in indoor warehouses. Fast forward to 2020, and that number dropped to 60%. At the same time, outdoor and greenhouse grows shot up by 13 percentage points. It’s pretty clear that growers are remembering how awesome it is to move their gardens outside. You can check out the details of this cultivation trend and see the numbers for yourself.
Unlocking Natural Potency and Flavor
So, what’s the big deal with the sun? It provides a full, dynamic spectrum of light that even the fanciest LED or HPS systems have a hard time faking. This intense, natural energy tells the plant to crank up its production of cannabinoids and terpenes—the stuff that gives cannabis its punch, flavor, and smell.
I like to think of it like this: indoor lights are a great cover band, but the sun is the original rockstar. Its light changes angle and intensity all day long, stimulating the plant in ways a static indoor light just can’t. The payoff is a more complex, robust, and authentic flavor in your final product.
The real magic of outdoor growing is letting nature be your partner. The sun, living soil, and even the breeze work together to create plants that are more resilient and expressive.
The Benefits of Going Au Naturel
Besides just the quality of light, an outdoor garden has a ton of practical perks. For a lot of folks, these advantages make it the best outdoor grow setup by a mile.
Here’s a quick rundown of what you gain:
- Massive Yields: With unlimited headroom and the sun’s raw power, outdoor plants can turn into absolute trees. It’s not uncommon for a single, well-tended outdoor plant to yield as much as a handful of indoor ones.
- Cost Savings: Let’s talk about that electric bill. Indoors, you’re constantly paying to run lights, fans, and dehumidifiers. Outdoors? Your main power source is completely free.
- Environmental Friendliness: An outdoor grow has a much smaller carbon footprint. You’re simply using fewer manufactured resources and working in sync with your local ecosystem. It’s a win for your wallet and the planet.
At the end of the day, growing outdoors is about embracing a more sustainable, natural, and often more rewarding way to grow your own.
Choosing Your Grow Location and Perfect Seeds
Alright, let’s get down to the most critical first step, and it won’t cost you a dime: finding the right spot. Before you even think about popping a single seed, you have to play scout. Nailing your location is half the battle won, and it’s the foundation for building the best outdoor grow setup.
The sun is your engine, plain and simple. You’re on the hunt for a patch of ground that gets a solid 6-8 hours of direct, unfiltered sunlight every single day. I always tell new growers to watch their yard like a sundial for a full day. See where the light hits in the morning, where it is at noon, and where it fades in the evening. A southern-facing spot is the gold standard for a reason—it gets the most intense light for the longest time, which is exactly what cannabis plants need to thrive.
But sun is only one piece of the puzzle. You absolutely need good airflow. Stagnant, humid air is a five-star invitation for powdery mildew and bud rot, two diseases that can wipe out your harvest almost overnight. Look for a location with a gentle, consistent breeze. This little bit of air movement is huge for keeping the leaves dry and your plants healthy.
And finally, let’s talk privacy. The best policy has always been “out of sight, out of mind.” Natural screens like fences, the side of a shed, or even some tall ornamental shrubs are your best friends here. Your goal is to keep your garden hidden from nosy neighbors or anyone just walking by, all without blocking that precious sunlight.
Finding Your Perfect Genetic Match
Once you’ve staked out your prime real estate, it’s time for the fun part: picking your seeds. This isn’t just about picking a cool-sounding strain; it’s about playing matchmaker. You need to find the right genetics that will flourish in your specific environment. The right strain for your climate can mean the difference between an easy, bountiful harvest and a summer-long headache.
Don’t fight your climate—work with it. Choosing seeds bred for your specific conditions is like giving your plants a massive head start before they even break ground.
Take a good, honest look at your local weather. Are your summers long and blazing hot, or are they short and cool? Is your area known for humidity and summer rain, or is it bone-dry? The answers to these questions are your roadmap to the perfect seeds.
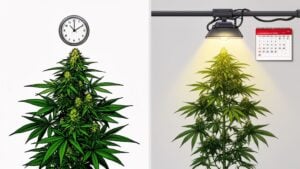
- For Short Summers (Northern Climates): You’re racing the clock, so you need plants that finish fast. Autoflowers are a brilliant choice because they flower based on age, not a changing light cycle, often finishing in a blistering 8-10 weeks from seed. Fast-flowering Indica-dominant photoperiods are another solid bet.
- For Humid, Rainy Climates (Southeast, Midwest): Mold and mildew will be your biggest enemies. Look for Sativa-dominant hybrids known for their airy, almost fluffy bud structure. That open structure allows for better airflow right through the flowers, which is your best defense against rot.
- For Hot, Dry Climates (Southwest): You need plants that can take the heat. Many landrace Sativas and tough-as-nails Indicas absolutely love these conditions. Your main job will be making sure they get plenty of water to power through the heat.
Use this quick-glance table to help you pick the right type of cannabis seed from Growers Choice Seeds for your climate and experience level.
Matching Your Outdoor Strain to Your Climate
| Strain Type | Best For Climate | Typical Height | Grow Time (Seed to Harvest) | Beginner Friendly? |
|---|---|---|---|---|
| Autoflower | Short summers, cool regions | Short (2-4 ft) | Very Fast (8-10 weeks) | Yes |
| Sativa-Dominant | Humid, rainy, warm regions | Tall (6-12+ ft) | Long (12-16+ weeks) | Intermediate |
| Indica-Dominant | Cool to moderate regions | Medium (3-6 ft) | Fast (10-14 weeks) | Yes |
| Hybrid | Varies widely by dominance | Varies (3-8 ft) | Varies (10-16 weeks) | Varies |
Choosing a strain that naturally thrives where you live makes everything easier, from watering to pest management.
Why Smart Seed Selection Matters Now More Than Ever
The boom in home growing is no secret. The global cannabis cultivation market is projected to hit an incredible USD 549.64 billion in 2024, with outdoor growing leading the way. It just makes economic sense—lower overhead and free, powerful sunlight that can boost cannabinoid production by 20-30% compared to LEDs. For American growers, picking a proven winner like a Cannabis Cup-winning Sativa hybrid means you’re getting genetics known for high THC and resilience to common issues like mold. You can dig into the data on this explosive market growth over at Precedence Research.
This growth means there are more eyes on breeding than ever before, resulting in better, more resilient genetics for home growers. It’s a great time to be growing your own. To see what’s out there, check out this fantastic resource on the best outdoor cannabis seeds and find a strain that feels like it was made for your backyard.
Putting in a little thought now on your location and seeds is the bedrock of your entire grow. Get these two things right, and you’re setting yourself up for a much smoother, more rewarding season and, ultimately, a heavier harvest come fall.
Building Your Foundation with Soil and Nutrients
Let’s get one thing straight: your soil is everything. It’s the literal foundation for your entire grow. You can have the best genetics and a perfect, sun-drenched spot, but if your plant’s roots aren’t happy, you’ll be fighting a losing battle all season long.
The secret to a truly stellar outdoor grow isn’t some complicated feeding chart with a dozen different bottles. It’s about building a rich, living soil that does most of the heavy lifting for you. When you focus on creating a thriving soil ecosystem, you’re not just giving your plants dirt to stand in—you’re feeding the soil, and the soil, in turn, feeds your plants. It’s a more natural, sustainable, and frankly, much easier way to grow amazing cannabis.
Crafting Your Own Super Soil
“Super soil” sounds like something out of a comic book, but it’s a pretty straightforward concept. It’s a soil mix you pre-amend with all the organic nutrients your plants will need from seedling to harvest. You mix it once, let it “cook” for a bit, and then for most of the grow, you just add water. No mixing liquid nutes every few days.
Here’s a simple recipe that works wonders for large fabric pots or raised beds. You can tweak this as you gain more experience, but it’s a killer starting point.
- The Base (~60% of total mix): Start with a high-quality, organic potting soil. The key is to find one without any pre-added, slow-release chemical fertilizers. A good coco coir and compost blend is a fantastic, peat-free option.
- Aeration (~30% of total mix): Healthy roots need to breathe. A mix of perlite and vermiculite is the classic combo for a reason. Perlite adds air pockets, while vermiculite helps retain moisture.
- The Good Stuff (~10% of total mix): This is the long-term food supply. My go-to blend includes earthworm castings, high-quality compost, and bat guano. This combination provides a slow, steady release of all the macro and micronutrients your plants will crave throughout their life.
The easiest way to mix this is on a big tarp. Just dump everything on, and get it all blended together thoroughly. Once it’s mixed, give it a light watering—just enough to make it damp, not soggy—and let it sit for a few weeks to a month. This “cooking” period lets the microbes activate and start breaking down all that organic goodness, making the nutrients available for your plants right from the start.
Keeping Your Soil pH in the Sweet Spot
Alright, let’s talk pH. It might sound like a chemistry class throwback, but it’s simply a measure of how acidic or alkaline your soil is. For cannabis, the magic number is a pH range between 6.0 and 7.0.
If the pH drifts too far outside this range, your plants get hit with “nutrient lockout.” This means that even if the nutrients are right there in the soil, the roots can’t absorb them. It’s one of the most common headaches for new growers.
Think of pH as the gatekeeper for nutrients. If the gate is closed (because the pH is off), it doesn’t matter how much food is in the soil—the plant simply can’t eat it.
The good news? A well-built, organic living soil does an amazing job of buffering its own pH. All that microbial life and organic matter helps keep things stable. Still, it’s wise to grab a simple soil pH test kit from any garden center. Check it once when you start and maybe again in the middle of flowering. If you need to make a small adjustment, it’s easy—dolomite lime will slowly raise pH, and elemental sulfur will slowly lower it.
The Art of Watering Correctly
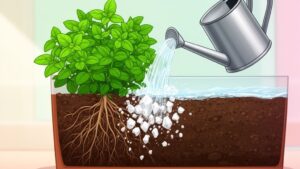
I’m going to say this loud and clear: more growers mess up with watering than anything else. We all want to care for our plants, but too much love in the form of water will suffocate the roots, invite root rot, and bring your grow to a grinding halt.
The goal is to let the soil dry out a bit between waterings. This does two important things: it allows oxygen to get to the roots, and it encourages the roots to grow deeper in search of moisture. So, ditch the rigid “water every Tuesday” schedule and learn to read your plants.
- For pots, use the “lift test.” Get a feel for how heavy your pot is right after a good watering. Then, lift it each day. When it feels noticeably lighter, it’s time to water again.
- For in-ground or raised beds, try the “knuckle test.” Just stick your index finger into the soil up to your second knuckle. If it feels dry at that depth, it’s time for a drink.
One last pro tip that will save you a world of hurt: always water in the morning. This gives the plant the whole day to drink up, and any moisture on the leaves will evaporate long before the cool, damp night sets in. This single habit is your best defense against powdery mildew.
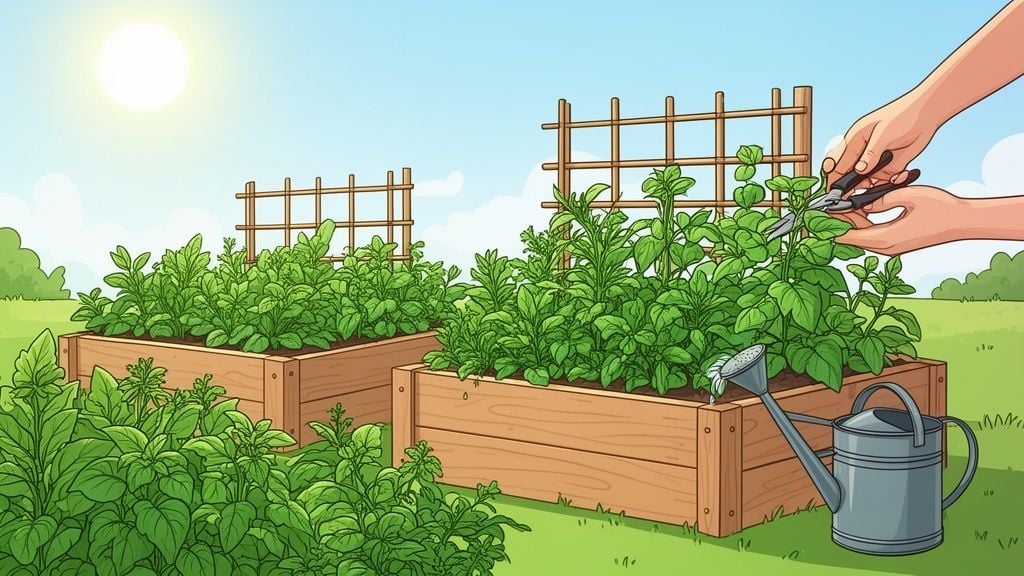
Training Your Plants for Bigger Yields and Better Health

Once your plants really start to take off, your role shifts from just being a gardener to becoming more of a coach. If you just let them do their thing, cannabis plants tend to grow like a Christmas tree, with one main stalk shooting straight up. That works, sure, but it’s far from the best way to soak up all that free sunlight. By actively training your plants, you can seriously boost your final harvest and keep your plants healthier in the process.
Think of yourself as a canopy architect. Your goal is to create a wide, flat, and even sea of green. When you pull this off, you’re exposing countless more branches—and all their future bud sites—to direct sunlight. More light means more energy, which translates directly into bigger, frostier flowers. It’s one of the most rewarding, hands-on parts of growing outdoors.
Getting Started with Low-Stress Training (LST)
Let’s ease into things with the gentlest, most beginner-friendly technique around: Low-Stress Training (LST). The name really says it all. You’re not cutting or breaking anything. You’re just gently persuading the plant to grow outwards instead of only upwards. It’s shockingly simple, but the results are incredible.
You just need some soft plant ties or padded garden wire and something to anchor them to, like the rim of your pot or stakes in the ground. Here’s how it works:
- Pick your moment: The best time to start is when your plant has 4-5 sets of leaves (we call these nodes). At this stage, it’s sturdy but still very flexible.
- Gently bend the main stalk: Carefully guide the main stem over until it’s running parallel to the soil. Be gentle! If you feel it resisting too much, back off and try again in a day or two.
- Tie it down: Use your soft tie to anchor the bent stem in place. The magic happens next: all the lower side branches, which were getting shaded out, will now turn up and start growing toward the light as if they are the main stalk.
- Keep on guiding: As these new “main” branches get taller, you’ll gently bend and tie them down too, always working your way outwards to create that flat, bushy shape.
LST isn’t a one-and-done deal. You’ll want to check on your plants every few days during their explosive vegetative growth to adjust ties and tame any new shoots that are reaching for the sky.
Topping for a Bushier Plant
Ready to be a little more hands-on? Topping is the next level. This technique involves making one simple, strategic cut that literally doubles your main growth tips. It sounds intimidating to a new grower, but it’s a fundamental practice that encourages a much bushier, more productive structure.
You’ll want to top your plant once it’s developed between 4 and 6 nodes. Grab a pair of clean, sharp scissors or pruning shears and just snip off the very top of the main stem, right above a set of leaves. That’s it. The plant’s response is to stop putting energy into that single stalk and instead push out two brand-new main branches from the node right below your cut. You can even top those new branches a couple of weeks later to get four main colas, then eight, and so on.
A killer combination for massive yields is to use both topping and LST. You top the plant to create multiple main stems, then use LST to spread them out wide. This creates an incredibly productive, even canopy that drinks in the sun.
Your First Line of Defense Against Pests
An outdoor garden is a living ecosystem, which means you’re going to have company. The key is to play defense from the start, not panic when you find a problem. A healthy plant is naturally more resistant to pests and diseases, but a little help from you can make all the difference.
One of the easiest and most effective strategies is companion planting. Some plants are fantastic for deterring common cannabis pests while attracting beneficial insects that act as your personal security team.
- Marigolds: A classic for a reason. Their distinct smell is known to repel pests like nematodes and whiteflies.
- Basil: This tasty herb works wonders to keep aphids and spider mites away.
- Lavender: It smells incredible and also helps deter fleas, moths, and other unwanted visitors.
For a more active defense, I always keep some neem oil on hand. When you use it as a foliar spray every week or two before you see any issues, it acts as a fantastic preventative shield against common headaches like powdery mildew and spider mites. Just make sure you stop spraying it once your plants start to flower, as you don’t want it affecting the final taste of your harvest. If you want to explore more advanced canopy management, you can learn more about how to SCROG marijuana plants in our detailed guide.
Harvesting and Curing for Top-Shelf Results
You’ve spent months nurturing your plants, and now you’re standing in front of some beautiful, frosty flowers. This is the moment you’ve been working towards, but don’t get ahead of yourself—the most important part for ensuring quality is just getting started. How you harvest and cure will literally make or break your entire season. It’s the difference between decent homegrown bud and true, connoisseur-grade flower.
Patience is your best friend here. Chopping your plants down too early is probably the most common rookie mistake, and it will tank your final yield and potency. Forget trying to eyeball it or just going by the breeder’s estimated flowering time—those are just guidelines. The only real way to know for sure is to get up close and personal with the trichomes.
Knowing Exactly When to Chop
Trichomes are those tiny, crystal-like glands covering your buds. They produce all the good stuff: cannabinoids and terpenes. To the naked eye, they just look like a layer of frost. But under magnification, they tell you the story of your plant’s ripeness.
You’ll need a simple tool for this job: a jeweler’s loupe with 30-60x magnification.
Grab your loupe and get a close look at the trichomes on the calyxes (the little pods that make up the bud itself), not the sugar leaves. You’ll see them go through three distinct stages:
- Clear: The trichomes look like tiny glass mushrooms. At this point, they’re still developing, and THC levels are low. Harvesting now is a big mistake.
- Cloudy/Milky: The heads turn an opaque, milky white. This is the sign of peak THC production and marks the beginning of the harvest window for a more energetic, cerebral high.
- Amber: The cloudy trichomes start turning a rich amber or golden brown. This tells you that THC is beginning to degrade into CBN, a cannabinoid known for its more sedating, “couch-lock” effects.
The perfect harvest time really comes down to personal preference. For a nice, balanced effect, most growers I know aim for a mix of about 70% cloudy and 30% amber trichomes. This sweet spot delivers high potency with a touch of relaxing body effects.
The Drying Process: Preserving Your Hard Work
Once you’ve made the cut, the goal is to dry your buds slowly and evenly. A fast, hot dry will just bake off all those precious terpenes, leaving you with a product that smells like hay and tastes harsh.
You need a dedicated drying space that is dark, cool, and has gentle air movement. A closet, a spare tent, or even a big cardboard box can work in a pinch. The ideal conditions are right around 60°F (15°C) and 60% relative humidity. Place an oscillating fan in the room—but don’t point it directly at the buds—to keep the air circulating and prevent mold. Hang your branches upside down, making sure there’s plenty of space between them.
You’ll know the drying process is finished when the smaller stems snap instead of bend. This usually takes anywhere from 7 to 14 days, depending on your environment and how dense your buds are. Seriously, don’t rush this step. It’s absolutely vital for locking in the aroma and flavor you worked so hard to develop.
Curing: The Final Step to Perfection
Drying gets most of the water out, but curing is the magic that truly transforms your harvest into something special. This slow, controlled process breaks down the chlorophyll and starches that cause a harsh smoke, allowing the terpenes to fully mature. A proper cure means a smoother smoke, a richer flavor, and a much longer shelf life.
It’s a simple process, but it’s non-negotiable:
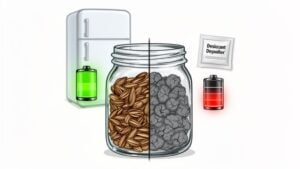
- Jar It Up: Once the buds feel dry to the touch, trim them off the branches and place them into airtight glass jars, like Mason jars. Only fill them about 75% full to leave some air.
- The “Burp”: For the first week, open the jars for 5-10 minutes once or twice a day. This releases built-up moisture and replenishes oxygen. We call this “burping.”
- Keep Curing: After that first week, you can cut back on burping to once every few days. The longer you cure, the better the final product. A minimum of two weeks is good, but four to eight weeks is where the real magic happens.
This final stage requires a bit more patience, but the payoff is huge. If you want to dive deeper into the science behind this crucial step, you can find a wealth of information on how to properly cure your harvest right here on our site. Your effort here is what puts the final signature on your masterpiece.
Ready to find the perfect genetics for your garden? At Growers Choice Seeds, we have over 500 lab-tested strains to match any climate or experience level. Browse our collection of autoflower, feminized, and high-THC seeds, all backed by a 90% germination guarantee. Find your perfect match today at https://www.growerschoiceseeds.us.
FAQs
What’s the Biggest Mistake You See New Outdoor Growers Make?
Easy. Overwatering. It almost always comes from a good place—people want to nurture their plants! But cannabis roots need to breathe. When the soil is perpetually waterlogged, the roots suffocate, which is a one-way ticket to root rot and stunted, unhappy plants.
The second-biggest mistake I see is impatience at harvest time. People get excited and chop their plants down way too early. You end up leaving a ton of potency and weight on the vine. Always trust what the trichomes are telling you, not the date on the calendar.
How Much Can I Realistically Get from One Outdoor Plant?
This is the million-dollar question, isn’t it? The real answer is, “it depends.” A small autoflower tucked into a 5-gallon pot might yield a few ounces, which is fantastic for a personal stash. But a huge photoperiod plant, given free rein in rich, amended earth, can easily top a pound—sometimes much more.
Your final harvest weight comes down to three main things: genetics, the length of your growing season, and, most importantly, sunlight. A plant basking in 8+ hours of direct sun will always crush one that only gets five. My advice? Stop chasing a specific number. Just focus on giving your plants the best possible environment, and you’ll be rewarded.
Can I Grow in a Pot on My Balcony?
You absolutely can. For city dwellers or anyone with limited space, it’s a brilliant way to grow your own. The trick is making the most of what you’ve got, especially when it comes to sunlight. If you have a south-facing balcony, you’ve hit the jackpot.