Auto")
 Auto")


Low-stress training, or LST, is a ridiculously simple concept. You’re just gently bending and tying down your plant’s branches to create a wider, flatter canopy. This one small adjustment can dramatically increase light exposure to all your bud sites, encouraging the plant to grow multiple large colas instead of just one. The best part? It boosts your overall yield without stressing the plant and stunting its rapid growth.
Why LST Is Your Autoflower’s Best Friend
So, you’ve decided to grow autoflowers. Great choice. You’re looking for a fast, no-fuss harvest, and autos are built for exactly that. But how do you get those chunky, top-shelf colas you see from seasoned growers without overcomplicating your setup? The secret isn’t some fancy nutrient line; it’s a simple, hands-on technique called Low Stress Training (LST).
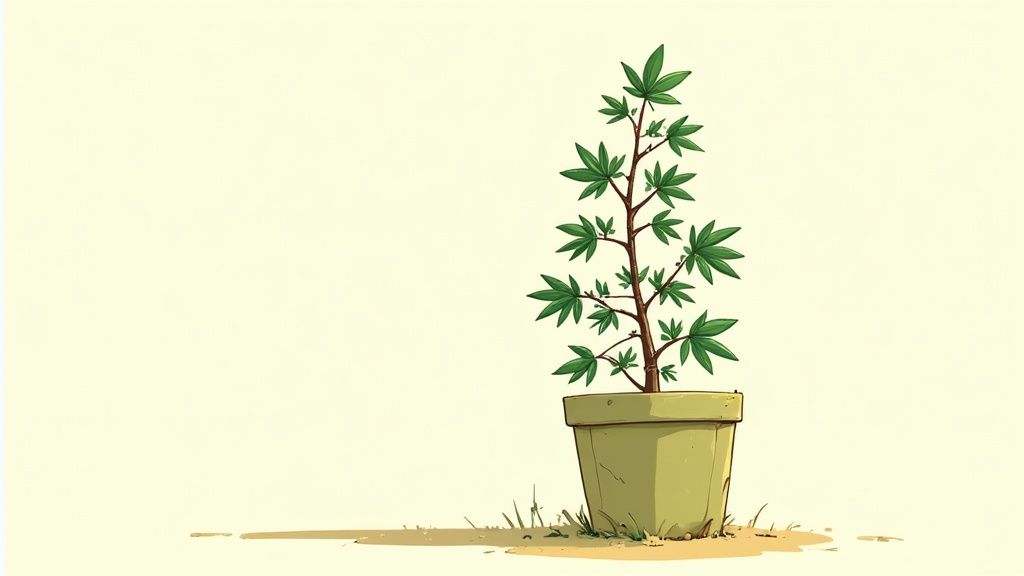
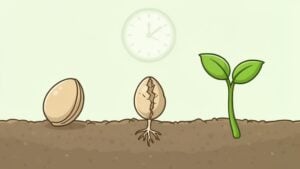
Think of it this way: your autoflower has a default growth pattern. It naturally wants to shoot straight up like a little Christmas tree, pouring all its energy into a single main cola. This is a natural tendency called apical dominance. While that one main cola can get pretty big, all the lower branches are left in its shadow, producing nothing but small, fluffy “popcorn” buds. That’s a ton of wasted potential just sitting there.
Break Apical Dominance For Bigger Yields
LST is how you step in and tell the plant to spread the wealth. By carefully bending that main stem down and tying it in place, you trick the plant into thinking its top is gone. This simple act breaks apical dominance and signals the plant to redirect growth hormones evenly to all the side branches.
Almost overnight, those lower shoots that were headed for mediocrity start stretching for the light, convinced that they are the new main event. This is the real magic of LST. You aren’t cutting or hurting the plant at all; you’re just redirecting its natural energy.
What does this get you?
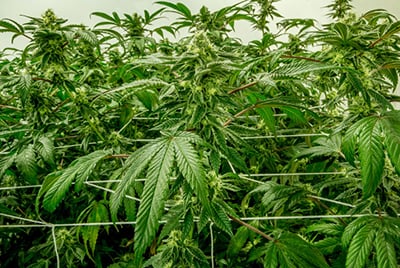
- An Even Canopy: Instead of a single tall spire, you get a flat, table-like canopy where every single bud site is bathed in direct, powerful light.
- Multiple Main Colas: Each of those newly-empowered branches develops into its own fat cola, which can massively increase your final harvest weight.
- Better Airflow: A wider, more open plant structure lets air move freely, which is a huge help in preventing common grow-room headaches like mold and pests.
Let’s look at what this means in practical terms.
LST vs Untrained Autoflowers At A Glance
Here’s a quick comparison that really shows the tangible benefits you get from applying a little LST to your grow.
| Attribute | Untrained Autoflower | LST Autoflower |
|---|---|---|
| Canopy Shape | “Christmas Tree” (tall & narrow) | “Table Top” (flat & wide) |
| Light Exposure | Excellent for the top cola, poor for lower branches | Excellent for all bud sites |
| Primary Colas | One dominant main cola | Multiple, evenly-sized colas |
| Yield Potential | Moderate | High |
| Air Circulation | Poor, risk of mold in dense foliage | Excellent, lower risk of mold/pests |
| Plant Height | Taller, can be hard to manage in tents | Shorter and wider, easy to manage |
As you can see, the difference isn’t just cosmetic; it directly translates to a healthier plant and a much heavier harvest.
A Perfect Match For Sensitive Plants
This gentle, hands-off approach is precisely why low-stress training and autoflowers are a match made in heaven. Autoflowers are on a strict timeline—their vegetative stage is short, and they will flip to flower on their own schedule, no matter what you do. High-stress training (HST) methods like topping or FIMing involve cutting the plant, which can be too much of a shock.
A single mistake with HST can stunt an auto for a critical week. With their short lifespan, they simply don’t have the time to bounce back from that kind of stress, and your final yield will absolutely suffer for it.
LST gives you all the rewards of training—bigger yields, more light, and height control—with none of the high-stakes risk. It’s the ultimate low-risk, high-reward technique for any autoflower grower.
The logic is clear. Growers love autos because they can slash grow cycles by 20-30%, finishing in as little as 8-10 weeks from seed. When you pair that speed with a gentle training method like LST, you can easily see yield increases of over 30%, sometimes pushing yields toward 450 grams per square meter.
It’s a powerful and efficient combination that’s perfect for getting the most out of modern, high-performance genetics. This is why we can’t recommend LST enough, especially for anyone growing our diverse collection of autoflower cannabis seeds. You chose autos for their speed and simplicity; LST just adds massive yields to the list of benefits.
Assembling Your Simple LST Toolkit
Let’s cut through the noise you see in some of those overly complicated grow diaries. You don’t need a shopping cart full of fancy gadgets to get great results with low-stress training. The best LST setups are built on a few cheap, simple, and incredibly effective tools. Our goal here is a practical, budget-friendly kit that just plain works.
What to Use for Tying
First things first: you need something to actually tie the branches down. The golden rule here is to use material that’s soft and won’t dig into the plant’s delicate stems as they grow and thicken. You’re training, not choking.
Here are a few battle-tested options:
- Soft Plant Ties: This is the stuff made specifically for the job. It’s basically a thin wire coated in soft rubber or foam. It’s gentle on the plant, a breeze to twist into place, and you can use it over and over again.
- Thick Twine or Garden String: A perfectly fine option, just be sure to grab something on the thicker side. You want to avoid that “cheese wire” effect that can slice right into a healthy stem.
- Pipe Cleaners: Seriously! Those fuzzy sticks from the craft store are fantastic. They’re soft, super flexible, and grip branches securely without causing any damage.
Your Pot Is Half The Battle
Okay, so you have your ties. Now you need something to anchor them to. This is where your choice of pot becomes a critical part of your LST strategy. In our experience, fabric pots are the undisputed champions for this. Their porous material makes creating anchor points almost laughably easy.
You don’t need to get complicated. A simple office hole punch or even the tip of a sharp knife is all it takes. Just pop a series of holes all the way around the upper rim of the pot. Boom. You now have dozens of spots to thread your ties, letting you pull branches down at any angle you need.
Working with standard plastic pots? No problem. The same principle applies. Just grab a drill and create some small holes around the lip. The idea is to give yourself plenty of options to adjust your ties as the plant stretches and bushes out.
Pro Tip: One of the biggest rookie mistakes is forgetting about anchor points until it’s too late. Take five minutes to drill a dozen holes in your pot rim before you even plant your seed. It will save you a world of headache later and is probably the single most effective LST hack out there.
Get Creative With Your Anchors
Drilling holes is the standard, but don’t be afraid to improvise. I’ve seen some clever growers use binder clips or even large safety pins clipped right onto the rim of their fabric pots. These give you instant, movable anchor points that you can reposition in seconds as the plant’s structure changes.
At the end of the day, your LST toolkit is just two things: soft ties and a pot with plenty of anchor points. That’s all you need to start shaping your autoflower for a much more impressive harvest. A little prep work like this is a core part of building a successful grow room and truly maximizing what your cannabis seeds can do.
The Week-By-Week Autoflower LST Schedule
With autoflowers, the clock is always ticking. Their speed is their greatest advantage, but it also means there’s no time to waste and very little room for error. When it comes to low-stress training autoflowers, timing isn’t just important—it’s everything. Jump in too early, and you risk stressing a fragile seedling. Wait too long, and you’ll be fighting stiff, woody stems that would rather snap than bend.
The goal here is to follow a flexible rhythm, not a rigid script. Every plant and every cannabis seed strain has its own personality, so think of this as a roadmap. You’ll need to watch your plant and respond to how it grows, but this weekly guide will give you the confidence to know exactly what to look for and when to act.
Weeks 1-2: Seedling to Pre-Veg
During the first couple of weeks, your job is simple: do nothing. Seriously. Your little autoflower is focused on establishing its taproot and building a solid foundation. Any attempt at bending or training now would be completely counterproductive and would likely stunt its growth right out of the gate.
Your only responsibility is to provide a stable environment with good light and proper watering. Just let the plant push out its first few sets of true leaves. You’re an observer at this point, letting the plant gain the strength it will need for the gentle manipulation to come.
Week 3: The First Gentle Bend
This is where the fun begins. Around week three, most autoflowers will have developed between four and five nodes—those are the points on the main stem where branches emerge. The main stem is still young, green, and pliable. This is the sweet spot you’ve been waiting for.
Now is the time to make your first move. Your goal is to bend the main stalk over gently, aiming for a near 90-degree angle so it runs parallel to the soil.
- Anchor First: Secure the base of the stem with a soft tie to a stake or the side of your pot. This simple step prevents you from accidentally yanking the plant out of the soil when you apply pressure.
- Bend Slowly: Gently and carefully pull the top of the main stem down toward the rim of your pot. Feel the resistance; if it feels like it might snap, ease off. You’ll develop a feel for it.
- Secure the Tip: Use another soft plant tie to anchor the top of the plant in its new horizontal position. Make sure the tie is loose enough to allow the stem to thicken without choking it off.
By doing this, you’ve just broken the plant’s natural tendency to grow one main cola (a concept called apical dominance). The lower side shoots will now get the signal to grow upward toward the light, and you’re on your way to building a wide, even canopy.
Week 4: Building Your Canopy
With the main stem secured, the once-small side branches will start stretching for the light. Your job during this week is to become the architect of your plant’s structure. As these new shoots grow taller, you’ll gently pull them down and away from the center of the plant.
The objective is to create a star or spiral shape when you look down on it from above. Each branch should have its own “lane” with clear access to light. This is an ongoing process; you might need to adjust your ties every couple of days as the plant responds and grows.
Keep your ties firm but gentle. You’re guiding the plant, not forcing it. Each adjustment helps solidify that flat, table-top canopy that is the signature of successful low stress training on autoflowers.
This infographic breaks down the simple tools that make this weekly process so effective.
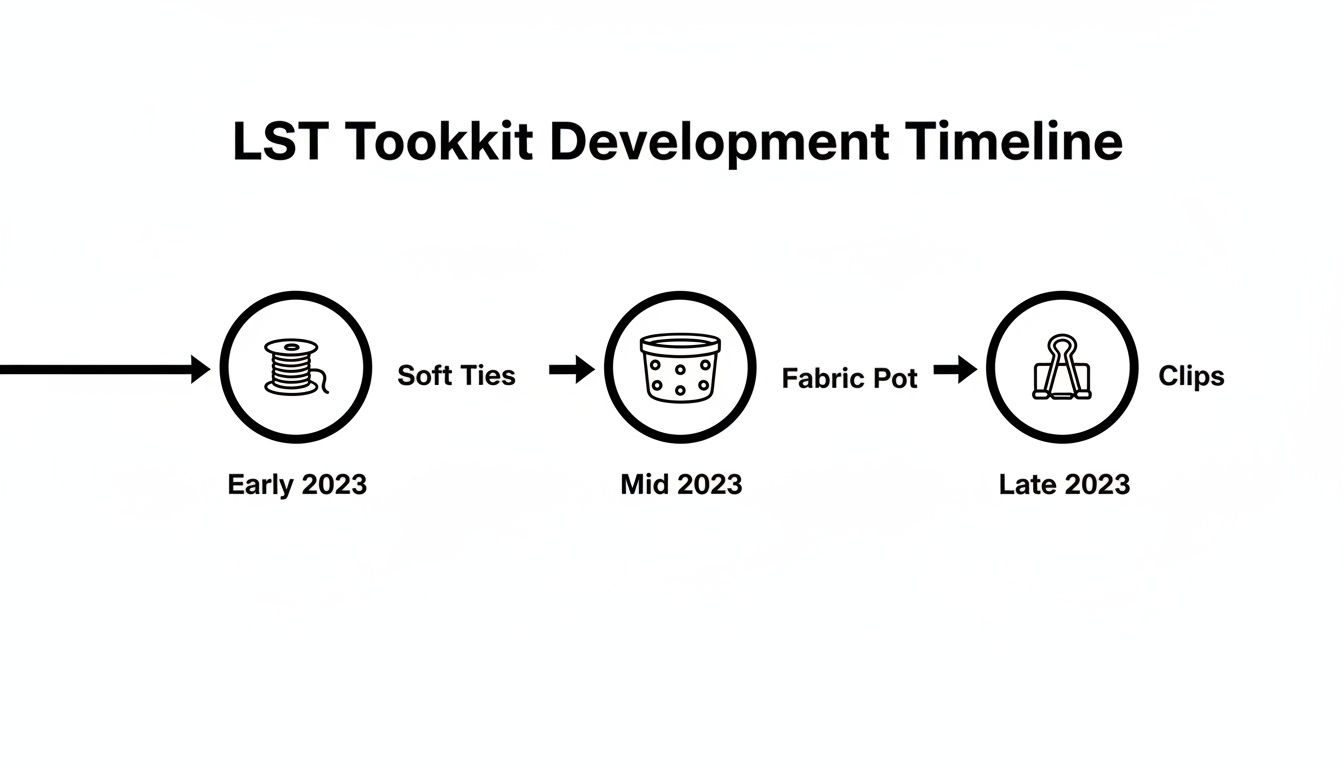
This visual timeline highlights how a few simple items like soft ties and a fabric pot with anchor points are all you need for effective training.
Weeks 5-6: The Pre-Flower Stretch and Final Adjustments
Around this time, your autoflower will likely start showing its first pistils, signaling the beginning of the flowering stage. This transition kicks off the “pre-flower stretch,” a period of explosive growth where the plant can double in size in just a week or two. Your LST work is more important now than ever.
Stay vigilant. Continue tying down any branches that try to outgrow the others, maintaining that flat canopy. This ensures that when the buds start to form, every single site is getting maximum light exposure. If you neglect LST during the stretch, you’ll end up with a few dominant colas again, undoing all your hard work.
Week 7 and Beyond: Ease Off the Training
Once the stretch is over and you see little buds (or “buttons”) forming all over your plant, it’s time to ease off. The branches will start to stiffen as the plant diverts all its energy into flower production. Further training at this point offers little benefit and risks snapping a bud-laden branch.
You can remove some of the initial ties if they seem too restrictive, but for the most part, your structural work is done. Your focus now shifts to maintaining the plant’s health through proper feeding and watering. You’ve set the stage for a massive harvest; now, it’s time to sit back and watch your perfectly trained plant pack on the weight.
Here’s a simplified breakdown to help you visualize the flow from week to week.
Sample LST Autoflower Timeline
| Week | Plant Stage | Key LST Action |
|---|---|---|
| Weeks 1-2 | Seedling | Observation only. Let the plant establish itself. |
| Week 3 | Early Veg | Perform the initial bend of the main stem to a 90-degree angle. |
| Week 4 | Mid Veg | Tie down new side shoots to create an even, open canopy. |
| Weeks 5-6 | Pre-Flower Stretch | Continue tying down dominant branches to maintain a flat canopy. |
| Week 7+ | Flowering | Cease training. Focus on feeding and bud development. |
This timeline is a great starting point, but always remember to “read” your plant and adjust as needed.
This LST method aligns perfectly with the rapid life cycle of autoflowering cannabis seeds, which have become a market favorite for good reason. Autoflowers mature quickly without needing light-cycle changes, and pairing them with LST can boost production by 20-30% in small spaces. Growers report that modern autoflower strains can finish in just 8-10 weeks, a huge advantage over the 12-16 weeks common for photoperiods. You can discover more insights about the booming cannabis seeds market and see how autoflowers are leading the charge.
Mastering The Art Of Bending And Tying
Alright, this is where theory hits the dirt. The hands-on work of bending and tying is what truly separates a decent harvest from a jaw-dropping one. It’s all about finesse, not force. Think of it as guiding your plant, not commanding it. Let’s get into exactly how to do this, from that first crucial bend to managing a full, flat canopy.
Making The First 90-Degree Bend
That first bend can feel like the scariest part of the whole process. But once you do it, you’ll realize just how resilient these plants are. The goal is simple: gently bend the main stalk down to a 90-degree angle so it runs parallel to the soil.
Here’s a little pro-tip: before you bend anything, gently roll the part of the stem you plan to bend between your thumb and forefinger for about 30 seconds. You’ll actually feel it soften and become more pliable. This simple move “warms up” the stem, drastically reducing the risk of it kinking or snapping.
Once it feels flexible, slowly pull the top of the plant down. Secure it to the side of your pot using a soft plant tie. Don’t winch it down—you’re just holding it in place. You’ll be amazed at how quickly the plant responds; its tip will turn back up towards the light, often within just a few hours.
With that one simple move, you’ve officially broken apical dominance. You’ve sent a clear signal to all those lower side shoots that it’s their time to race for the light, and they will respond with an explosive burst of vertical growth.
Shaping Your Canopy Like A Pro
After that initial bend, your job shifts to managing the side branches. As they shoot upward, your task is to gently guide them down and away from the center of the plant. When you look down from above, you’re aiming to create a spiral or starburst shape. This gives every single branch its own real estate and direct access to that precious light.
This is a continuous process, not a one-and-done deal. You’ll need to check in on your plant every couple of days to make small adjustments. A branch that was perfectly positioned on Monday might be shading its neighbor by Wednesday.
- Work from the inside out: Always start by training the branches closest to the main stem first. Then, work your way out to the edges.
- Create tension, not stress: Your ties should be just snug enough to hold a branch in its new home. If you see the tie digging into the stem, it’s definitely too tight and needs to be loosened.
- Vary your anchor points: Use different spots around the pot’s rim to pull branches in multiple directions. This is how you maximize that horizontal spread.
This is also where the high-stress vs. low-stress training debate heats up. Some growers are tempted to top their autos, but with their short fuse, it’s a risky gamble. For a deeper dive, see our breakdown of topped vs. non-topped plants to understand why LST is almost always the safer bet for autoflowers.
Adapting Your Technique To The Strain
Not all genetics are created equal, and your LST approach needs to reflect that. A stretchy, sativa-dominant autoflower requires a different touch than a short, bushy indica.
For a tall, lanky sativa like a Haze auto, you’ll need to be more aggressive with your horizontal training. The goal is to control its height and keep it from stretching into your light. Pull those long branches way out to the sides of the pot to force that flat canopy.
On the flip side, with a compact indica variety, your main goal is to open up its naturally dense structure. You’ll be pulling branches outward to improve airflow and get light deep into that thick central core. A little leaf tucking also works wonders here. Instead of pulling leaves off, just gently tuck any large fan leaves under nearby bud sites to give them a clear view of the light.
Troubleshooting Common LST Mistakes
No matter how many grows you’ve got under your belt, things can still go sideways. It happens to the best of us. The good news is that with autoflowers and low-stress training, almost every little hiccup is fixable and serves as a great lesson for the next round.
Let’s walk through a few common snags and how to handle them without breaking a sweat.
Handling A Snapped Branch
Ah, the dreaded “snap.” That sickening little crack you hear when you’re gently bending a branch is enough to make any grower’s heart sink. But don’t panic and definitely don’t give up on the branch.
If it’s just kinked or partially broken but not completely torn off, you can absolutely play plant medic. The fix is surprisingly simple.
- Act fast. Grab some tape—plain old Scotch tape, electrical tape, or even duct tape will do the trick.
- Create a splint. Carefully push the broken parts back into their natural position and wrap the tape securely (but not too tightly!) around the break. You’re basically making a tiny cast.
- Be patient. In about a week or two, the plant will heal itself, forming a tough, woody “knuckle” at the break point. Once that knuckle feels solid, you can gently remove the tape.
Honestly, that healed branch often comes back even stronger than before. So, while it’s a stressful moment, it’s rarely a grow-ending disaster.
My Plant Looks Droopy After Training
Seeing your once-perky plant looking sad and droopy an hour after a training session can be worrying. But before you start blaming your LST technique, take a breath. More often than not, the training session just happened to coincide with another issue.
Is the pot light? Is the soil dry an inch down? Your plant is probably just thirsty. Give it a good watering, and it should perk right back up within the hour. On the flip side, if the pot feels heavy and the soil is soaked, you could be overwatering. LST itself is so gentle that it rarely causes a plant to wilt on its own.
Think of it this way: droopiness is your plant’s way of talking to you. Nine times out of ten, it’s saying it’s either thirsty or drowning, not that it’s mad about being gently tied down.
Running Out Of Room In Your Tent
Okay, this is what we call a “good problem to have.” It means your low-stress training is working like a charm! You’ve created such a wide, bushy plant that it’s starting to push the boundaries of your grow space.
When you run out of horizontal real estate, it’s time to start thinking vertically.
Instead of pulling new growth further outward, you can start guiding branches slightly upward with your ties. You can also get creative by adding bamboo stakes to create new anchor points closer to the plant’s center, helping you manage the footprint while keeping the canopy even. A little strategic leaf tucking can also go a long way in opening up the canopy and letting that precious light hit the lower bud sites.
This is a classic scenario when you’re working with vigorous cannabis seeds that respond exceptionally well to LST. It’s a clear sign you’re on the right track for a fantastic harvest.
LST & Autoflower FAQs: Your Questions Answered
Even with the best guide, questions are bound to pop up, especially when you’re bending your plants for the first time. Let’s clear the air on some of the most common things growers ask about LST for autoflowers. Getting these sorted will help you train with more confidence and sidestep some classic mistakes.
Can I Combine LST With Topping On An Autoflower?
I’m going to be honest: it’s a gamble I almost never recommend. The beauty of an autoflower is its speed, but that speed is its biggest vulnerability. They run on a tight, non-negotiable schedule and have very little time to bounce back from high-stress techniques (HST) like topping or FIMing.
Think about it—a botched topping job or even just a slow-healing plant can easily stall for a week. On an auto’s short veg cycle, a lost week is a disaster for your final yield. LST is the name of the game because it delivers bigger harvests without hitting the pause button for recovery.
If you’re itching to do more, stick to safer methods. Combining LST with a little light defoliation later in veg or simply tucking fan leaves throughout the grow are much better options. You’ll improve light penetration without shocking your plant.
What Is The Best Light Setup For An LST Grow?
Modern LED grow lights and LST are a match made in heaven. When you train your plant into a wide, flat canopy, you’re making sure every single bud site is getting an equal shot at the light.
This creates an even playing field, allowing you to lower your LED to its sweet spot—maximizing light intensity (or PAR) across all your buds without the risk of torching a single tall cola. This uniform light distribution is the whole point of LST, and it’s what swells up those secondary buds that would otherwise be left behind in the shadows.
A quality, full-spectrum LED is the perfect partner for a well-trained plant. The combo lets you squeeze every last drop of performance out of the watts you’re paying for.
I Started LST Too Late and the Stems Are Stiff. What Do I Do?
We’ve all been there. If the main stems feel woody and stiff, listen to the plant—they’re telling you they’ll snap before they bend. It’s best to just leave them alone. You missed the prime window for shaping the main structure, and forcing it now will only break a branch and stress the plant right when it needs to be focusing on flowering.
Don’t beat yourself up. Chalk it up as a lesson for your next run. The key takeaway is to start your LST early, around week 3, when the plant is young and pliable.
But that doesn’t mean it’s a total wash! Shift your focus to what you can do. You can still gently guide the younger, greener side branches that are flexible. You can also get serious about leaf tucking. Carefully tucking away any large fan leaves that are casting shadows on lower bud sites is a simple move that can still make a real difference in your final harvest.
Ready to put your LST skills to the test with genetics that respond beautifully to training? At Growers Choice Seeds, we offer a massive selection of premium, lab-tested autoflower cannabis seeds perfect for your next grow. Explore our collection and find the perfect strain to maximize your harvest at https://growerschoiceseeds.us.